Table of Contents
ToggleOutdoor outlets make yard work, holiday lighting, and backyard entertaining possible. But unlike interior receptacles, exterior outlets face rain, snow, and moisture, conditions that create serious shock and fire hazards without proper protection. That’s where GFCI outlets come in. Required by the National Electrical Code (NEC) for all outdoor installations, GFCI (Ground Fault Circuit Interrupter) outlets detect electrical faults and cut power in milliseconds, preventing electrocution. Whether you’re adding a new outlet for landscape lighting or replacing an old receptacle, understanding GFCI technology, code requirements, and proper installation will keep your outdoor electrical system safe and compliant.
Key Takeaways
- GFCI outdoor outlets are required by the National Electrical Code for all exterior receptacles and detect electrical faults in milliseconds, cutting power before electrocution can occur—making them essential for outdoor safety.
- All outdoor GFCI outlets must be weather-resistant (WR-rated) models with corrosion-resistant components to withstand moisture, temperature changes, and UV exposure without degrading.
- Proper installation requires matching the GFCI outlet’s amperage (15A or 20A) to your circuit breaker, using a weatherproof bubble-style cover for exposed areas, and sealing the outlet box perimeter with exterior-grade silicone caulk.
- Monthly testing of your GFCI outlet—by pressing the Test button to verify it trips and the Reset button restores power—ensures the protection mechanism works when you need it most.
- Replace outdoor GFCI outlets every 10 to 15 years and immediately if the indicator light is off, the outlet won’t reset, or it fails the test function, as a malfunctioning GFCI provides no shock protection.
What Is a GFCI Outdoor Outlet and Why Is It Essential?
A GFCI outlet monitors the flow of electricity between the hot and neutral wires. When it detects even a tiny imbalance, as small as 4 to 6 milliamps, it trips the circuit in roughly 1/40th of a second. That speed matters because it takes only 10 to 20 milliamps to cause muscle paralysis, making it impossible to let go of a live wire.
Outdoor environments amplify electrical hazards. Wet grass, metal tools, damp extension cords, and direct rain exposure all lower the body’s electrical resistance, increasing shock severity. A standard 15-amp breaker won’t trip until current reaches roughly 15,000 milliamps, far beyond lethal levels.
Standard outlets lack ground fault detection entirely. They’ll keep delivering power even if current leaks through a damaged cord, faulty tool, or a person’s body. GFCI outlets are designed specifically to prevent these scenarios involving outdoor outlets by cutting power before injury occurs.
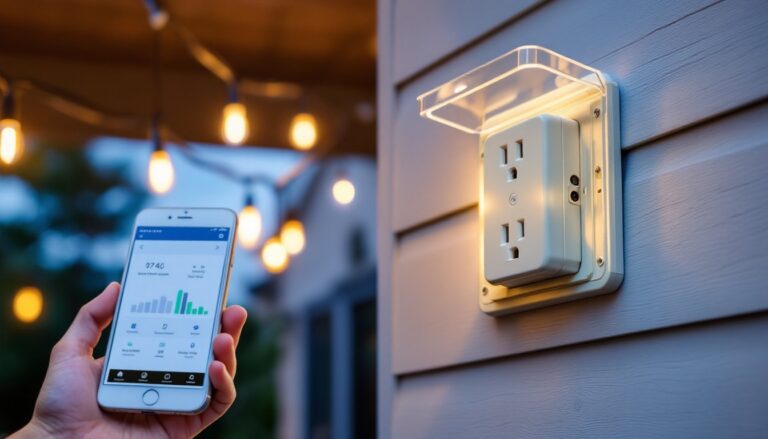
Visually, GFCI receptacles are easy to identify: they feature Test and Reset buttons between the two plug slots. Most units also include an indicator light (usually red or green) showing protection status. The outlet itself looks bulkier than a standard duplex receptacle because the detection circuitry is housed inside.
When and Where Are GFCI Outlets Required Outdoors?
The NEC has required GFCI protection for outdoor outlets since 1973, with updates tightening those rules over time. As of the 2020 NEC (still widely adopted in 2026), all outdoor receptacles rated 150 volts or less to ground and 50 amps or less must have GFCI protection. This applies to both 15-amp and 20-amp circuits.
Specific outdoor locations include:
- All receptacles at grade level (patios, decks, porches, balconies)
- Outlets installed below grade level (below ground or in recessed wells)
- Receptacles on rooftops (except those dedicated to HVAC or snow-melt equipment, which have separate rules)
- Any exterior outlet within 6 feet of a pool, spa, or hot tub (though pool equipment circuits have additional requirements under NEC Article 680)
Local amendments sometimes exceed national code. Some jurisdictions require tamper-resistant GFCI outlets outdoors if children are present. Others mandate weather-resistant (WR-rated) receptacles even under covered areas.
Permits are typically required for new outdoor outlet installations or circuit extensions. Inspectors will verify proper GFCI protection, conduit type, burial depth (if wiring runs underground), and box height above grade. Even simple outlet replacements on existing circuits may need permits in some municipalities. Check with your local building department before starting work.
Choosing the Right GFCI Outlet for Your Outdoor Space
Not all GFCI outlets are built the same. Outdoor installations demand weather-resistant (WR) models, which feature corrosion-resistant components and materials that withstand humidity, temperature swings, and UV exposure. Standard GFCI outlets designed for bathrooms or garages lack these protections and will degrade faster outdoors.
Look for the “WR” marking stamped on the outlet face. Many manufacturers color-code WR models differently (often gray or beige instead of white) to distinguish them at a glance.
15-amp versus 20-amp ratings: Most residential outdoor circuits run on 15-amp breakers using 14 AWG wire. If your circuit uses 12 AWG wire and a 20-amp breaker, you’ll need a 20-amp GFCI outlet. The outlet face will show a horizontal slot on the neutral side. Don’t install a 15-amp outlet on a 20-amp circuit, it creates a code violation and a potential fire hazard.
Self-test GFCIs (required in newer NEC editions) automatically check their own protection circuitry every few seconds. If the device fails, it either trips or blocks power entirely, preventing a false sense of security. Older models require manual monthly testing, which homeowners often skip.
Weather-Resistant Cover Types
The outlet box cover determines how much weather protection your receptacle gets. Three main styles exist:
-
Flat “while-in-use” covers: These have spring-loaded doors that close over the plug slots when nothing’s connected. They’re code-compliant for vertical surfaces (walls), but offer minimal protection when a cord is plugged in. Water can seep in around the plug during rain.
-
Bubble or dome “in-use” covers: These enclose the entire outlet and any plugged-in cord with a hinged, weatherproof housing. They’re required in wet locations where cords stay connected (like landscape lighting or fountain pumps). The cover stays sealed even with cords inserted. Most models accommodate one or two plugs simultaneously.
-
Vertical “flip-up” or “horizontal” covers: These hinged lids protect the outlet when nothing’s plugged in but don’t offer in-use protection. They meet code for dry or damp locations (like covered porches) but not for exposed areas.
Choose bubble covers for exposed locations. They cost $15–$30, compared to $5–$10 for flat covers, but they’re worth it. Make sure the cover is rated for the depth of your outlet box. Deep boxes (2-gang or extra-capacity) need deeper covers.
How to Install a GFCI Outdoor Outlet: Step-by-Step Guide
Before starting: Confirm local code allows homeowner installation. Some jurisdictions require licensed electricians for all outdoor electrical work. Pull permits where required.
Tools and materials:
- Weather-resistant GFCI outlet (15A or 20A, matching circuit breaker)
- Weatherproof in-use cover (bubble or dome style)
- Voltage tester (non-contact or two-lead)
- Wire strippers
- Needle-nose pliers
- Screwdriver set (flathead and Phillips)
- Silicone caulk (exterior-grade)
- Wire connectors (if needed)
Safety gear: Safety glasses, work gloves, rubber-soled shoes. Work in dry conditions only.
Step-by-step process:
-
Turn off power at the breaker panel. Flip the breaker controlling the outdoor circuit to OFF. Label the breaker with tape so no one turns it back on while you’re working.
-
Verify power is off. Remove the existing outlet cover and use a voltage tester on the terminals and wires. Test between hot and neutral, hot and ground, and neutral and ground. No voltage should register.
-
Remove the old outlet. Unscrew the mounting screws and pull the receptacle out of the box. Note which wires connect where, take a photo if helpful. Outdoor circuits sometimes have two sets of wires (line and load) if the outlet feeds other receptacles downstream.
-
Identify line and load wires. GFCI outlets have four brass/silver terminals labeled LINE and LOAD. Line terminals connect to the power source (the wires coming from the breaker panel). Load terminals connect to downstream outlets that will also receive GFCI protection. If your installation has only one set of wires, they connect to LINE terminals only. Leave LOAD terminals empty.
-
Connect the wires. Attach the black (hot) wire to the brass LINE terminal, white (neutral) to the silver LINE terminal, and bare or green (ground) to the green ground screw. If you have downstream wires, connect them to LOAD terminals. Tighten terminal screws firmly, loose connections cause arcing and failure.
-
Fold wires into the box carefully. GFCI outlets are bulkier than standard receptacles. Arrange wires in an S-fold or zigzag to avoid pinching. Make sure no bare wire is exposed outside terminal screws.
-
Mount the outlet. Screw the GFCI into the box with mounting screws. Outdoor boxes often have threaded ears or adjustable brackets. Ensure the outlet sits flush and level.
-
Seal the box perimeter. Run a thin bead of silicone caulk around the box edge where it meets the siding or surface. This prevents water from seeping behind the box.
-
Attach the weatherproof cover. Install the bubble or in-use cover according to manufacturer instructions. Most use the same mounting screws that hold the outlet.
-
Restore power and test. Flip the breaker back on. Press the Reset button on the GFCI until it clicks (the indicator light should illuminate). Plug in a lamp or voltage tester to confirm the outlet is live. Press the Test button, the outlet should trip immediately, cutting power. Press Reset again to restore function.
If the GFCI won’t reset, the outlet may be wired incorrectly (line and load reversed) or you have a ground fault somewhere in the circuit. Double-check wiring and consult a professional electrician if problems persist.
When to call a pro: If you’re running new wire through walls, trenching underground conduit, or installing a new circuit breaker, hire a licensed electrician. Those tasks involve structural penetrations, conduit bending, and panel work that require permits and inspections. Many step-by-step tutorials help with simpler electrical tasks, but outdoor circuit extensions exceed most DIYer skill levels.
Testing and Maintaining Your Outdoor GFCI Outlet
Self-test GFCIs run internal diagnostics automatically, but manual testing is still recommended once a month. Press the Test button, the outlet should trip immediately and the reset button should pop out. Press Reset to restore power. If the outlet doesn’t trip or won’t reset, replace it immediately. A failed GFCI offers no protection.
Outdoor outlets accumulate dirt, moisture, and insect nests inside the box. Inspect covers and gaskets twice a year (spring and fall). Look for cracks, UV damage, or missing foam gaskets. Water intrusion causes corrosion on terminals and neutral/ground bars, leading to nuisance tripping or complete failure.
Clean outlet faces with a damp cloth. Avoid pressure washers or direct hose spray, even with weatherproof covers, high-pressure water can infiltrate seals.
Cold weather considerations: GFCI outlets can become sluggish or fail to reset in temperatures below 32°F. If you live in a freezing climate and need winter power (for heated livestock waterers, etc.), consider installing the GFCI inside a heated space (garage or basement) and running protected wiring to the outdoor outlet.
Replace outdoor GFCIs every 10 to 15 years, even if they still test properly. Internal components degrade from temperature cycling and humidity exposure. If your outlet is original to a house built before 2006, it’s likely not weather-resistant and should be upgraded.
Common Problems and Troubleshooting Tips
GFCI trips immediately when reset: This indicates a ground fault somewhere on the circuit. Possible causes include damaged extension cords, water inside the outlet box, a faulty tool or appliance, or wire insulation nicked during installation. Unplug everything and try resetting. If it holds, plug devices in one at a time to isolate the culprit. If it still trips with nothing connected, inspect the box for moisture or damaged wiring.
Outlet won’t reset at all: The GFCI itself may be defective, or line and load wires may be reversed. Verify correct wiring with power off. If wiring is correct, replace the outlet.
Nuisance tripping (outlet trips randomly with no apparent cause): Long wire runs (over 100 feet) or circuits with multiple outlets can accumulate small leakage currents that add up and trip the GFCI. Moisture in buried conduit, corroded connections, or aging wire insulation also cause phantom trips. Consider splitting the circuit or installing a GFCI breaker at the panel instead of a GFCI receptacle.
Indicator light off but outlet still works: The GFCI has failed internally and is no longer providing protection. Replace it immediately. Homeowner repair resources often emphasize that a non-functioning indicator light is a critical safety warning.
Outlet doesn’t trip during test: The GFCI is defective. Replace it. Do not continue using an outlet that fails testing, it won’t protect against shocks.
Water inside the cover: Check gasket condition, ensure the cover is latched fully, and verify that the outlet box is caulked properly around the perimeter. Pooled water in the bottom of a bubble cover is often normal, these covers are designed to drain through weep holes. If water is inside the outlet box itself, turn off power and let it dry completely before restoring service.
Arc or buzzing sound: This signals a loose connection or failing outlet. Turn off power immediately and inspect terminal screws. Tighten any loose connections or replace the outlet if terminals are corroded or damaged.