Table of Contents
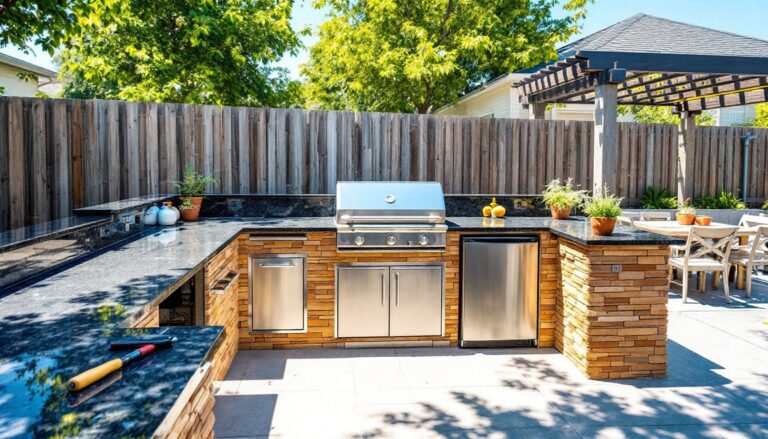
ToggleAn outdoor kitchen remodel turns underused patio space into a year-round hub for cooking, entertaining, and adding serious equity to your property. Whether you’re grilling steaks for the neighbors or prepping weeknight dinners al fresco, a well-planned outdoor kitchen combines functionality with the kind of durability that stands up to rain, sun, and smoke. This isn’t cosmetic, expect to deal with gas lines, electrical runs, and weather-resistant materials that won’t warp or corrode. Get it right, and you’ll gain square footage that pays dividends at the dinner table and on the appraisal.
Key Takeaways
- An outdoor kitchen remodel transforms underused patio space into a functional, year-round entertaining hub that adds significant property value when planned and executed properly.
- Prioritize a professional gas and electrical setup—hire licensed plumbers and electricians for gas lines, water connections, and 240V circuits to ensure code compliance and safety.
- Choose durable, weather-resistant materials like stainless steel, granite, quartzite, or marine-grade polymer for cabinets and countertops to withstand UV exposure, freeze-thaw cycles, and moisture.
- Apply the work-triangle principle by positioning your grill, sink, and refrigeration within a few steps of each other, and maintain at least 48 inches of clearance for traffic and 8–10 feet between cooking and seating zones.
- Budget 15–20 percent contingency for unexpected site conditions, schedule inspections before closing walls or pouring concrete, and plan winterization steps like line drainage and propane tank removal for year-round durability.
Planning Your Outdoor Kitchen Remodel
Start with a site assessment. Walk the footprint with a measuring tape and note existing utilities, gas, water, electric. If you’re tapping into your home’s propane or natural gas line, you’ll need a licensed plumber and likely a permit. Same goes for 120V or 240V electrical circuits for refrigerators, outlets, or vent hoods. Check local building codes early: most jurisdictions require setbacks from property lines and clearances from combustible siding.
Sketch a rough layout showing appliance zones (grill, sink, refrigeration, prep counter) and traffic flow. Think about prevailing wind direction, nobody wants smoke blown back toward the seating area. If your yard slopes, factor in drainage and whether you’ll need a concrete pad with proper grading to prevent water pooling under cabinets.
Setting Your Budget and Timeline
Budgets for outdoor kitchens range from $5,000 for a basic grill island with countertop to $50,000+ for a fully appointed setup with pizza ovens, kegerators, and custom stonework. Material choices drive cost: poured concrete counters run less than granite or quartzite, and prefab stainless-steel cabinet frames cost a fraction of masonry block construction.
Timeline hinges on scope and weather. A DIY modular island can go up in a weekend: a full masonry build with utilities may take four to eight weeks once permits clear. Schedule inspections for gas and electrical rough-ins before closing walls or pouring concrete. Budget a 15–20 percent contingency for unforeseen site conditions like buried irrigation lines or the need for a dedicated gas regulator.
Essential Features for a Functional Outdoor Kitchen
At minimum, plan for a grill, a prep counter (at least 24 inches of landing space on either side of the grill), and storage for propane, tools, and seasonings. Built-in grills come in natural gas and propane configurations: if you’re running a gas line, hire a pro, improper installation is both a code violation and a safety hazard.
A sink with hot and cold water elevates functionality but adds plumbing complexity. You’ll need frost-proof hose bibs or heat-traced lines in cold climates, plus a drainage solution, either a tie-in to your home’s sewer lateral or a dry well if codes allow. Pair the sink with a garbage disposal rated for outdoor use if you’ll be rinsing vegetables or fish.
Refrigeration keeps beverages cold and ingredients fresh. Outdoor-rated refrigerators and ice makers are built with stainless interiors and weather-sealed compressors. Avoid repurposing an indoor fridge: humidity and temperature swings will kill the compressor within a season. For serious cooks, a side burner for sauces or a pizza oven adds versatility. Many outdoor spaces also benefit from adding outdoor heaters to extend the season into fall and spring.
Choosing the Right Materials for Durability and Style
Outdoor kitchens face UV, freeze-thaw cycles, and moisture, so material selection matters. For countertops, granite, quartzite, and porcelain slabs handle heat and weather without sealing as often as marble. Poured or precast concrete offers a modern look and accepts integral color or acid staining: seal it annually with a penetrating sealer to prevent staining from grease and wine.
Avoid laminate and butcher block, both delaminate or rot outdoors. Tile works but requires a mortar bed over cement backer board and frost-proof grout rated for exterior use. Grout lines collect grime, so go with large-format tiles and tight joints.
For cabinetry and structure, marine-grade polymer or stainless-steel frames outlast wood. If you prefer the look of wood, use Ipe or teak, both dense enough to resist rot, but expect regular oiling to maintain color. Painted wood, even with exterior-grade paint, will peel and warp unless you’re committed to refinishing every two years. Masonry block veneered with stacked stone or brick delivers the most longevity, it won’t rust, warp, or fade. Finish the structure with a capstone to shed water away from the block core.
Flooring should be slip-resistant. Textured concrete, natural stone pavers, or porcelain tile with a matte finish all work. Steer clear of polished surfaces: they turn into ice rinks when wet. Setting pavers on a compacted gravel base with polymeric sand joints allows for drainage and slight movement without cracking.
Layout and Design Considerations
Adopt the work-triangle principle from indoor kitchens: position the grill, sink, and refrigerator within a few steps of each other to minimize back-and-forth. Linear layouts suit narrow patios: L-shapes or U-shapes create defined zones and offer more counter space for a crowd.
Counter height typically runs 36 inches (standard kitchen height) or 42 inches (bar height). Bar-height counters double as casual seating with the right stools but can feel awkward for detailed prep work. If you’re mixing heights, use the taller section for serving and drinks, the lower for chopping and plating.
Leave at least 48 inches of clearance behind the cook for foot traffic and chair pull-out. If you’re incorporating a dining table or lounge seating, zone it eight to ten feet from the grill to keep smoke and heat out of guests’ faces. Overhead structures like pergolas or covered outdoor living space ideas provide shade and can support lighting or ceiling fans, but maintain clearance above the grill per manufacturer specs, usually 36 inches minimum to combustible materials.
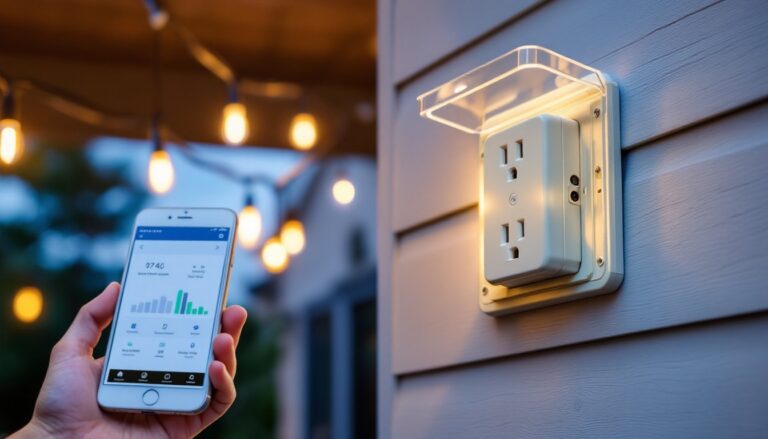
Lighting is non-negotiable for evening use. Install low-voltage LED strip lights under counters and inside cabinets, plus task lighting over the grill and prep zones. Use fixtures rated for wet or damp locations depending on exposure. Outlets should be GFCI-protected and covered with weatherproof boxes: the National Electrical Code (NEC) requires GFCI protection for all outdoor receptacles.
DIY vs. Professional Installation: What to Know
Assess your skill set honestly. If you’ve framed walls, run PEX, and pulled permits before, a modular outdoor kitchen kit is within reach. Prefab islands ship with stainless frames, and you bolt in the grill, add the countertop, and connect utilities. Companies like Bull, Lynx, and Blaze offer kits starting around $3,000: you supply the countertop and finishing touches.
Gas and electrical work are different. Most codes require a licensed plumber for gas-line extensions and a final pressure test before inspection. Similarly, adding a new 240V circuit for a built-in grill with rotisserie or a fridge requires a licensed electrician and a permit. DIYing these trades without permits can void homeowner’s insurance and create liability if something fails.
Masonry work, laying block, veneering stone, or pouring a concrete slab, demands experience with mortar mixing, leveling, and rebar placement. Hire a mason if you lack that background: a bowed wall or slab that pitches the wrong way will haunt you. For guidance on broader projects that share similar scope, many homeowners start with a complete home remodeling plan to coordinate utilities and design flow.
General contractors can pull permits, coordinate subs, and ensure inspections pass. Expect to pay 15–20 percent of material and labor costs as a GC fee, but you’ll avoid delays and code violations. If budget allows, invest pro dollars in the hardscape and utilities, then DIY the countertop install, cabinet assembly, and finishes.
Weatherproofing and Maintenance Tips
Stainless steel weathers better than painted steel, but it’s not maintenance-free. Coastal environments accelerate pitting: wipe down grill grates and cabinet faces with fresh water monthly to remove salt spray, and apply a stainless cleaner with a light oil to prevent oxidation. Choose 304 or 316-grade stainless for marine-grade corrosion resistance, especially if you’re within ten miles of the ocean.
Gas lines need drip legs (sediment traps) and shutoff valves accessible outside the structure. Inspect flexible connectors annually for cracks or kinks. Water lines should have isolation valves inside the house and drain plugs at low points if you’re in a freeze zone. Blow out lines with compressed air before the first hard freeze, or install heat tape on exposed pipe runs.
Cover grills and appliances when not in use: UV and rain degrade knobs, igniters, and seals. Custom-fit covers outperform generic tarps. Clean grease traps and vent hood filters every few months to prevent flare-ups and odors. Stone and concrete surfaces benefit from an annual penetrating sealer, avoid topical sealers that can peel or yellow.
Inspect mortar joints and grout lines each spring. Repoint any cracks before water infiltrates and causes freeze damage. For more ideas on creating durable outdoor home living spaces, research materials that align with your climate and usage patterns. Platforms like Houzz offer galleries of completed projects with material lists and contractor reviews. Regional design magazines such as Sunset publish climate-specific guides for outdoor kitchens in arid, coastal, and mountain zones.
Winterize by shutting off gas and water, draining lines, and removing propane tanks to a ventilated storage area. Pull batteries from igniters and remote controls. Inspect electrical boxes for wasp nests or rodent damage before firing everything back up in spring. With routine care, a well-built outdoor kitchen will serve for decades, adding value, functionality, and countless meals under the sky.