Table of Contents
ToggleThe SimpliSafe Outdoor Camera is one of the more straightforward security installations a homeowner can tackle in a weekend. No professional installer required, no hardwired electrical work, and no drilling into finished siding if the homeowner doesn’t want to. The camera runs on a rechargeable battery, connects via Wi-Fi, and mounts with just a few screws. That said, placement matters more than most folks realize, get it wrong, and the homeowner ends up with glare-washed footage or constant motion alerts from passing cars. This guide walks through the full process, from prep to app setup, so the camera works the way it’s supposed to from day one.
Key Takeaways
- SimpliSafe outdoor camera installation is a straightforward weekend DIY project requiring no professional installer or hardwired electrical work, with the camera connecting via 2.4 GHz Wi-Fi and mounting with basic screws.
- Optimal camera placement should be 7 to 9 feet high, away from direct sunlight and reflective surfaces, with strong Wi-Fi signal strength—positioning is critical to avoid glare-washed footage and false motion alerts.
- Before installation, fully charge the battery using the included USB cable, gather essential tools (drill, screwdriver, level, ladder), and confirm your router broadcasts a 2.4 GHz network band for reliable connection.
- The two-step mounting process involves first securing the bracket with a level for alignment, then snapping the camera onto the bracket and tightening the security set screw with the provided hex key to prevent theft.
- Fine-tune motion detection in the SimpliSafe app by setting motion zones to exclude street traffic and tree movement, adjusting sensitivity from medium baseline, and enabling person-detection alerts to reduce false positives.
- Test the camera’s performance by walking through its 120-degree field of view before finalizing placement, using the live feed in the app to confirm proper framing and motion triggering.
What You Need Before Installing Your SimpliSafe Outdoor Camera
Before climbing a ladder, gather everything and confirm the home’s Wi-Fi setup will support the camera. SimpliSafe’s Outdoor Camera requires a 2.4 GHz Wi-Fi network, it won’t connect to 5 GHz bands. Many modern routers broadcast both, but the installer needs to know the network name (SSID) and password for the 2.4 GHz band specifically.
Tools and materials:
- Drill with bits (for masonry, use a masonry bit: for wood or vinyl, a standard twist bit works)
- Phillips-head screwdriver
- Pencil for marking holes
- Tape measure
- Ladder (if mounting above ground level)
- Level (optional but helpful for clean alignment)
- Safety glasses (especially when drilling overhead)
The camera kit includes the mounting bracket, screws, and wall anchors. The anchors work for drywall or masonry. If mounting to brick or stucco, confirm the drill bit matches the anchor size, typically 3/16-inch for the included anchors.
Battery charge: Out of the box, the battery may not be fully charged. Plug it in using the included USB cable and let it charge until the LED indicator shows solid. A half-charged battery can die mid-setup, which is frustrating when the installer is already on a ladder.
SimpliSafe app and account: Download the SimpliSafe mobile app (iOS or Android) and log in to the existing SimpliSafe account. If the homeowner doesn’t have a SimpliSafe system yet, they’ll create an account during app setup. The camera works as a standalone device or integrates with a full SimpliSafe alarm system.
Choosing the Perfect Location for Your Camera
Camera placement determines what gets recorded and how often the installer will climb back up to adjust it. The SimpliSafe Outdoor Camera has a 120-degree field of view, which covers a standard driveway or front porch without trouble. Mount it too high, though, and faces blur out. Too low, and it’s within reach of tampering.
Height: Aim for 7 to 9 feet off the ground. This height captures faces clearly while staying mostly out of reach. If mounting above 9 feet, angle the camera downward more sharply to keep faces in frame.
Wi-Fi range: The camera must sit within reliable range of the home’s Wi-Fi router. Exterior walls, especially brick or stucco, weaken signals. Before drilling, test the signal strength at the planned location using a smartphone. Open the SimpliSafe app and check the Wi-Fi bars during setup, if they drop to one or two bars, consider moving the router closer to that wall or adding a Wi-Fi extender.
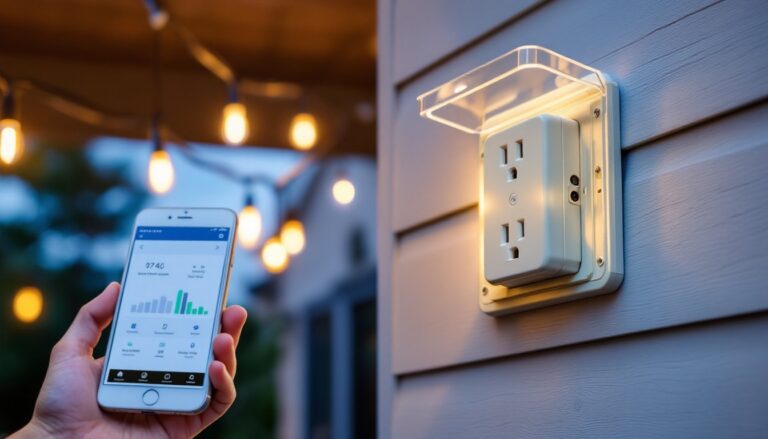
Power source (if hardwiring): The SimpliSafe Outdoor Camera runs on battery by default, but the homeowner can hardwire it to a standard outdoor electrical outlet if one exists nearby. Hardwiring eliminates battery recharges. If going this route, make sure the outlet is weatherproof and GFCI-protected per NEC code. Turn off power at the breaker before making any electrical connections.
Avoid these spots:
- Directly facing the sun during peak hours, lens glare washes out footage
- Pointing at reflective surfaces like windows or car windshields
- High-traffic areas with constant motion (sidewalks, busy streets), these trigger false alerts and drain battery faster
- Under eaves that trap heat, excessive heat shortens battery life
Test the view before committing. Hold the camera bracket at the proposed spot and use the SimpliSafe app’s live view (during initial setup) to confirm the frame captures what’s needed.
Step-by-Step Installation Process
Mounting the Camera Bracket
The bracket secures to the wall first: the camera snaps onto it afterward. This two-piece design makes adjustments easier and lets the installer remove the camera for charging without unscrewing anything.
Step 1: Hold the bracket against the wall at the chosen height and use a level to ensure it’s straight. Mark the screw holes with a pencil. There are typically two or three mounting holes depending on the bracket version.
Step 2: Drill pilot holes at the marked spots. For wood siding or studs, use a 1/8-inch twist bit. For brick, stucco, or concrete, use a 3/16-inch masonry bit and insert the included wall anchors. Tap the anchors flush with the surface using a hammer.
Step 3: Align the bracket over the holes and drive the screws in with a Phillips-head screwdriver or drill with a driver bit. Tighten until snug, but don’t overtighten, stripped threads in an anchor won’t hold. The SimpliSafe bracket has a ball-joint design, so minor misalignment can be corrected by adjusting the camera’s angle after it’s mounted.
Step 4: Snap the camera onto the bracket. It clicks into place and locks with a small set screw on the bottom (included in the kit). Tighten this screw with the provided hex key to prevent theft. Without it, the camera pops off the bracket with a twist.
Connecting to Power and Wi-Fi
Once the bracket is secure, power up the camera and connect it to the network. The SimpliSafe Outdoor Camera won’t record or send alerts until it’s connected to Wi-Fi and activated in the app.
Step 1: Insert the charged battery into the camera if it’s not already installed. Slide the battery compartment cover off (it’s on the back) and push the battery in until it clicks. Replace the cover, it’s weather-sealed with a rubber gasket, so make sure it sits flush.
Step 2: Hold down the setup button on the top of the camera for about two seconds. The LED on the front will flash blue, indicating it’s in pairing mode. Battery-powered designs eliminate the need for hardwired electrical connections in most installations.
Step 3: Open the SimpliSafe app on a smartphone and tap Add Device or the + icon. Select Outdoor Camera from the list of devices. The app will prompt entry of the home’s Wi-Fi network name and password. Again, confirm it’s the 2.4 GHz network.
Step 4: The app searches for the camera. Once found, it displays a pairing code on the phone. Enter this code if prompted on another device, or confirm the connection in the app. The camera LED will turn solid blue, then white, indicating a successful connection.
Step 5 (optional hardwiring): If hardwiring the camera, plug the included power adapter into a nearby weatherproof outlet. Run the cable along the wall or through a small drilled hole, securing it with cable clips. The camera automatically switches to wired power when plugged in, and the battery acts as a backup during outages. Always use a GFCI outlet for outdoor electrical connections.
Setting Up Your Camera in the SimpliSafe App
After the camera connects to Wi-Fi, finish configuration in the app. This step customizes motion zones, adjusts sensitivity, and enables features like night vision and the built-in spotlight.
Step 1: Name the camera based on its location (e.g., “Front Porch,” “Driveway,” “Backyard”). This helps when managing multiple cameras or reviewing footage later.
Step 2: Set motion zones to define which areas trigger recording. The app overlays a grid on the live view, tap zones to enable or disable them. Exclude zones that capture street traffic, swaying tree branches, or the neighbor’s driveway to reduce false alerts.
Step 3: Adjust motion sensitivity. Start with medium sensitivity and increase it if the camera misses events, or decrease it if it records too often. Factors like wind, pets, and changing light (sunrise, sunset) affect motion detection. Features like spotlight activation improve night visibility and deterrence.
Step 4: Enable night vision and configure the spotlight. Night vision activates automatically in low light. The spotlight can turn on when motion is detected, or stay off to conserve battery. Continuous spotlight use drains battery quickly, set it to motion-activated unless hardwired.
Step 5: Configure notifications. Choose whether to receive push alerts for every motion event, person detection only, or no alerts (recording still happens). SimpliSafe’s person detection uses AI to filter out animals and objects, but it’s not perfect, expect occasional false positives.
Step 6: Test the camera by walking through its field of view. Check the live feed in the app and confirm motion triggers recording. Adjust the camera angle using the ball joint if the frame needs tweaking. Loosen the bracket’s adjustment knob, reposition, and retighten. Real-world testing confirms installation effectiveness before finalizing placement.
Optional: Set up people-only alerts. In the app, navigate to camera settings and enable People Only Mode if available with the subscription plan. This reduces alerts from passing cars or animals but requires a SimpliSafe monitoring plan for the AI feature.
Conclusion
A SimpliSafe Outdoor Camera installation takes about 30 minutes once the location is chosen and the battery is charged. The hardest part is usually getting the Wi-Fi signal strong enough and dialing in motion zones to avoid alert fatigue. After that, it’s a set-it-and-forget-it device, until the battery runs low in a few months and needs a recharge.