Table of Contents
ToggleHomeowners are rediscovering what architects have known for decades: the best square footage isn’t always measured inside four walls. Indoor outdoor living blurs the boundary between interior comfort and outdoor space, creating homes that breathe, expand, and adapt to how people actually live. It’s not about adding a patio set or propping open a door, it’s about intentionally designing spaces that function as one continuous environment. Whether tackling a full renovation or weekend projects, understanding the principles behind seamless transitions makes all the difference between a house with a deck and a home that truly flows.
Key Takeaways
- Indoor outdoor living eliminates psychological and physical barriers between interior and exterior spaces by using intentional design principles, material continuity, and seamless transitions that function as one continuous environment.
- Material consistency—particularly large-format porcelain tile, dense tropical hardwoods, and coordinated ceiling treatments—creates visual flow, while properly specified sliding glass doors and corner windows maximize natural light and uninterrupted sightlines between zones.
- Covered outdoor living rooms, outdoor kitchens, fire features, and strategic heating systems extend functionality year-round in any climate by incorporating electrical circuits, adequate lighting, and proper permitting.
- Successful drainage is essential before any hardscape installation—slope outdoor living areas at least 1/4 inch per foot away from the house and properly compact gravel bases to prevent water damage and foundation issues.
- Testing layout with temporary or modular solutions first, obtaining required permits, and honestly assessing your skill level before tackling projects prevents costly mistakes and ensures both safety and code compliance.
What Is Indoor Outdoor Living?
Indoor outdoor living refers to design strategies that integrate interior and exterior spaces so they function as extensions of each other. It goes beyond aesthetic choices, this approach considers traffic flow, climate control transitions, sightlines, and material performance in both environments.
The concept gained traction in mid-century modern architecture but has evolved dramatically. Today’s versions incorporate technologies like retractable wall systems, radiant patio heating, and weatherproof electrical installations that meet NEC (National Electrical Code) outdoor ratings. The goal is eliminating the psychological and physical barriers between inside and out.
Successful indoor outdoor spaces share three characteristics: they’re accessible without steps or significant threshold changes, they use materials that transition naturally between zones, and they maintain year-round functionality in their climate. A sliding door opening to a wood deck in Minnesota serves this purpose differently than a pocket wall system leading to a covered Arizona courtyard, but both honor the same principles.
This isn’t purely a warm-climate luxury. Cold-weather regions achieve it through three-season rooms, insulated pavilions, and strategic use of outdoor living features that extend shoulder seasons. The key is designing for actual use patterns rather than magazine photos.
Key Design Principles for Seamless Indoor Outdoor Spaces
Creating genuine flow between interior and exterior requires planning beyond furniture placement. These foundational principles guide successful integration.
Creating Visual Continuity with Materials and Colors
Material transitions either announce “you’re outside now” or whisper “the room just got bigger.” The latter requires deliberate choices. Flooring presents the biggest opportunity, and challenge.
Continuing interior flooring materials onto covered patios creates immediate visual flow. Large-format porcelain tile (12×24 inches or larger) works both indoors and out when rated for freeze-thaw cycles in cold climates. Look for tiles with a wet DCOF (Dynamic Coefficient of Friction) rating above 0.42 for outdoor safety. Wood-look porcelain splits the difference for homeowners wanting warmth without actual wood’s maintenance.
For authentic wood, Ipe, cumaru, and other dense tropical hardwoods withstand weather while matching interior oak or walnut tones. Expect to pay $8-15 per board foot depending on region and grade, plus hidden fastener systems add roughly $2 per square foot to installation.
Color palette continuity matters as much as materials. Exterior wall paint, cushion fabrics, and hardscape should pull directly from interior schemes. Designers following garden and outdoor design principles often limit outdoor palettes to three colors that already appear inside, letting plants provide accent variety.
Ceiling treatments get overlooked but matter tremendously. Carrying interior ceiling color or wood treatment onto a covered porch eliminates the “we added this later” feel. Tongue-and-groove pine or cedar plank ceilings, stained to coordinate with interior trim, run $3-6 per square foot installed and dramatically improve perceived integration.
Maximizing Natural Light and Sightlines
Uninterrupted views and daylight penetration amplify the connection between spaces. Door and window selection drives this more than any other single decision.
Sliding glass door systems range from basic two-panel units ($800-2,000 for quality brands like Pella or Marvin) to multi-panel stacking systems ($5,000-15,000+). The latter disappear entirely when open, essentially removing a wall. Multi-slide and lift-and-slide systems require engineered headers capable of carrying the load above, consult local building codes and likely a structural engineer for spans over 12 feet.
Folding glass walls (bifold or accordion-style) offer similar effects. Properly specified units include interlocking weatherstripping and multipoint locks. Cheap versions leak air and water: quality systems from Nanawall, LaCantina, or Marvin cost $800-1,200 per linear foot installed.
Window placement should align between interior rooms and outdoor spaces. A kitchen window at counter height that frames a view of the grill area and dining space creates purposeful connection. Avoid the common mistake of centering windows on exterior walls without considering interior furniture placement, nothing breaks flow like a window blocked by a refrigerator.
Corner windows and glass returns eliminate visual stops. Removing the structural corner post requires engineered headers and often doubled studs, but the result makes indoor and outdoor spaces feel continuous even when the door’s closed. Check local codes, as some jurisdictions require special hurricane or wind-load ratings for these installations.
Transom windows above doors bring light deep into interiors while maintaining privacy. A 12-16 inch transom above a standard 6’8″ door creates dramatic ceiling height and helps balance light levels between zones.
Popular Indoor Outdoor Living Features to Consider
Certain features consistently deliver strong functionality and visual integration. These are the workhorses of successful indoor outdoor projects.
Covered outdoor living rooms function as true extensions when properly equipped. This means dedicated electrical circuits (GFCI-protected per NEC), adequate lighting (aim for 20-30 lumens per square foot), and ceiling fans rated for damp or wet locations depending on exposure. A 12×16 foot covered space typically needs at least two dedicated 20-amp circuits, one for lighting and fans, another for outlets.
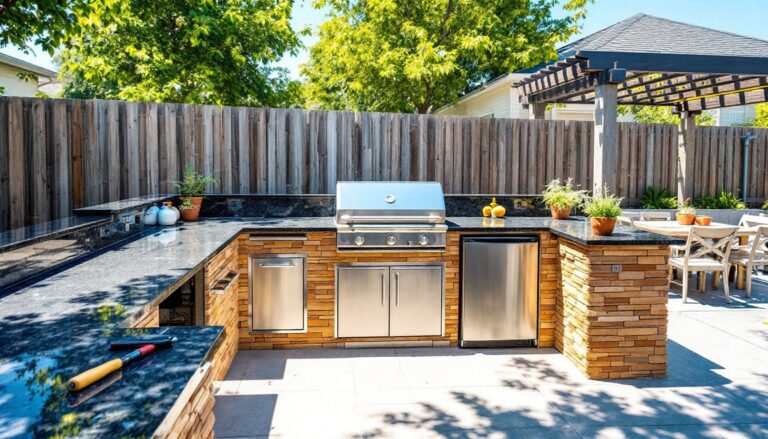
Outdoor kitchens eliminate the indoor-outdoor-indoor dance during entertaining. Basic setups include a built-in grill, small refrigerator, and sink. Water supply lines must be drained or heat-traced in freeze-prone areas. Plumbing codes typically require backflow preventers on outdoor kitchen water lines.
Gas lines for grills require permitting in most jurisdictions. Hire a licensed plumber for this, improper installation creates explosion and carbon monoxide risks. Expect to pay $300-800 for a professional gas line run from the house to a patio grill location.
Fire features create gathering spots that extend usability into cooler months. Prefabricated fire pits run $300-2,000: custom built-in fireplaces range from $3,000-15,000+ depending on materials and complexity. Gas models require the same careful installation as outdoor kitchens. Wood-burning features need clearance distances specified in IRC (International Residential Code) and may require spark arrestors depending on local fire regulations.
Outdoor heating extends season length considerably. Infrared heaters warm people and objects rather than air, making them efficient for open spaces. Ceiling-mounted models work well in covered areas: freestanding units suit open patios. Budget $150-500 per heater for quality residential units.
Retractable screens and shades control bugs, sun, and weather without permanent visual barriers. Motorized systems cost $800-2,500 per opening but integrate with smart home systems. Manual versions run $200-600 per window or door. For projects incorporating advanced outdoor systems, motorization often makes sense given the other investments.
Pergolas and shade structures define outdoor rooms without enclosing them. A basic 12×12 wood pergola costs $2,500-6,000 in materials for a DIY build using pressure-treated or cedar lumber. Aluminum and vinyl versions require less maintenance but cost 30-50% more. Retractable fabric canopies add $800-3,000 depending on size and quality.
Practical Tips for DIY Indoor Outdoor Projects
Homeowners can tackle many indoor outdoor improvements without hiring contractors, but success requires honest assessment of skills and proper sequencing.
Start with site prep and drainage. Water flowing toward the house ruins everything else. Outdoor living areas need to slope away from the structure at minimum 1/4 inch per foot for the first 10 feet. Mark the slope with string lines and check with a 4-foot level before laying any hardscape. This isn’t optional, improper drainage causes foundation problems, rot, and insect issues.
For patio installations, excavate 6-8 inches below finished surface level. Add 4 inches of compactable gravel base (not river rock), compact in 2-inch lifts with a plate compactor (rent for $60-80/day). Top with 1 inch of leveling sand, screed flat, then lay pavers or stone. Polymeric sand swept into joints locks everything together.
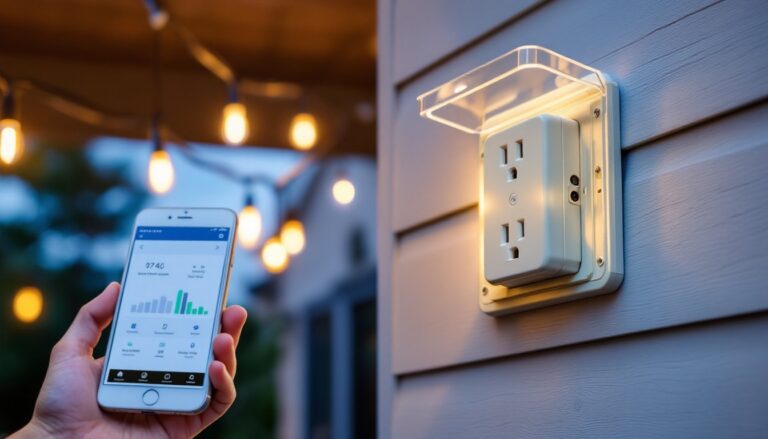
Extend electrical service before finishing surfaces. Running conduit after the patio’s done means tearing it up. Outdoor outlets require GFCI protection and weatherproof covers (in-use covers for equipment that stays plugged in). Bury UF-B (Underground Feeder) cable at code-required depths: typically 24 inches for direct burial, 18 inches if in conduit, but check local amendments.
If electrical work feels beyond comfort level, hire a licensed electrician for rough-in, then finish the patio and trim work yourself. Most projects at regional outdoor living events showcase this hybrid approach.
Paint exterior surfaces with climate-appropriate products. Not all exterior paint handles moisture equally. For high-humidity regions, Southern design approaches often favor acrylic latex with mildewcides. Hot, dry climates do better with paints containing more binder for UV resistance. One gallon covers roughly 350-400 square feet per coat: most outdoor applications need two coats for durability.
Install doors and windows correctly or hire it out. Improper flashing causes 80% of door and window failures. If tackling this DIY, follow manufacturer instructions exactly, specifically the flashing details. Use flexible flashing tape, not just caulk. For large multi-panel systems, hire professionals. The cost of fixing water damage from improper installation dwarfs the installation labor cost.
Consider temporary or modular solutions first. Testing layout and function before permanent construction prevents expensive mistakes. Use outdoor rugs to define spaces, try different furniture arrangements, observe sun and wind patterns across seasons. Many homeowners discover their “perfect” patio location has afternoon sun blast or wind tunnel effects only after building.
Always check permit requirements before starting. Deck and patio permits typically trigger when structures are attached to the house, exceed certain sizes (often 200 square feet), or include electrical/plumbing. Permits aren’t just bureaucracy, they ensure proper construction and maintain home value. Unpermitted work creates problems during home sales and insurance claims.
Safety gear is non-negotiable. Concrete and stone work requires safety glasses and dust masks (N95 minimum when cutting pavers). Treated lumber demands gloves, the chemicals irritate skin. Power saws need hearing protection: most operate at 95-110 decibels, and hearing damage starts at 85 decibels with extended exposure. Keep a first aid kit on site, cuts and scrapes happen even to experienced DIYers.
Conclusion
Indoor outdoor living creates homes that adapt to how families actually use space rather than forcing life into rigid rooms. Success comes from treating the transition zone as intentionally as any interior space, with proper materials, adequate infrastructure, and honest assessment of climate and lifestyle needs. Start with one high-impact project, learn the skills, then expand. The result is square footage that works harder and living space that breathes.