Table of Contents
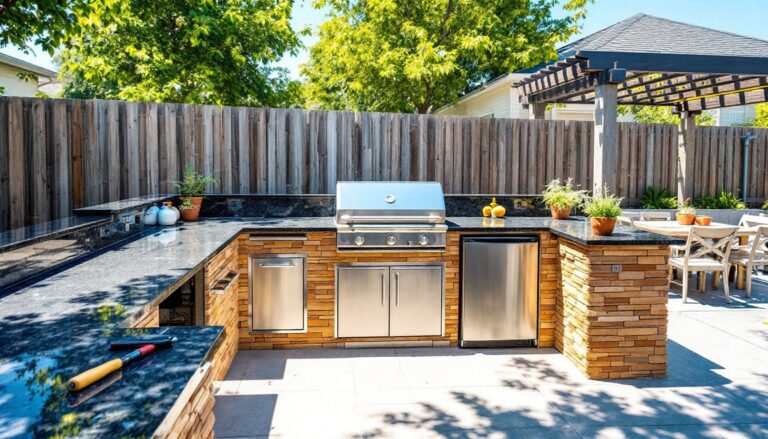
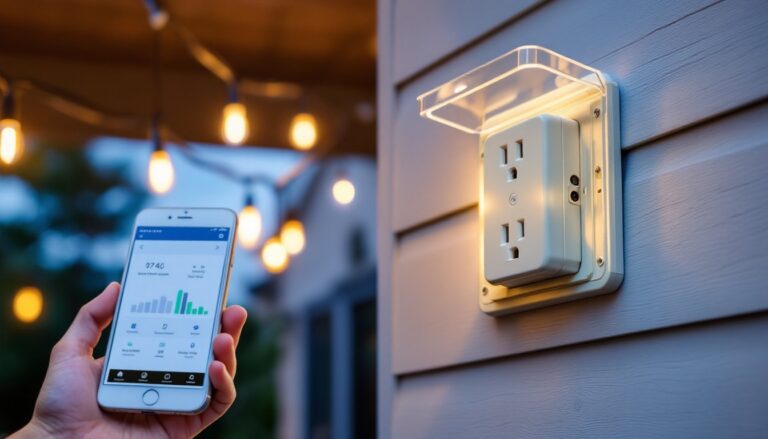
ToggleOutdoor lighting isn’t just about flipping a switch anymore. Smart light switches bring scheduling, voice control, and remote access to porch lights, garage floods, and landscape fixtures, without replacing every bulb or fixture. Whether a homeowner wants lights that turn on at sunset or the ability to control everything from a phone, a smart switch retrofits existing outdoor lights into a connected system. Installation takes about the same time as swapping a standard switch, and the payoff includes energy savings, improved security, and the convenience of automation. Here’s what to know before buying and installing a smart light switch for outdoor use.
Key Takeaways
- A smart light switch for outdoor lights enables scheduling, voice control, and remote access without replacing existing bulbs or fixtures, with installation comparable to swapping a standard switch.
- Smart switches improve security through automated occupancy schedules and motion-triggered lighting, while reducing energy costs via geofencing and timers that prevent forgotten outdoor lights from running all night.
- Look for compatibility with existing wiring (neutral wire requirement), adequate load capacity (150–600W range), and durability ratings like IP65+ for outdoor fixtures exposed to weather and temperature extremes.
- Popular options like Lutron Caseta, TP-Link Kasa, and GE Cync offer varying protocol choices—Wi-Fi, Zigbee, or Z-Wave—with most supporting Alexa and Google Assistant integration for hands-free control.
- Installation typically takes 30–60 minutes and mirrors standard switch replacement, but requires identifying wires correctly and connecting ground, neutral, line, and load wires according to manufacturer diagrams.
- Automation setup—including sunset/sunrise scheduling, geofencing, and scene creation—unlocks the real benefits of a smart switch and significantly boosts user satisfaction when integrated with broader home automation systems.
Why Upgrade to a Smart Light Switch for Your Outdoor Lighting
Traditional outdoor light switches require manual operation or basic timers that drift out of sync with seasonal sunset shifts. Smart switches solve this by connecting to Wi-Fi or a hub, allowing control via smartphone apps, voice assistants like Alexa or Google Assistant, and automation rules that adjust to real-world conditions.
Security is a primary driver. Automated schedules create the appearance of occupancy when traveling, and motion-triggered routines can flood a driveway with light the moment someone approaches. Unlike motion-sensor bulbs, a smart switch controls all fixtures on the circuit simultaneously.
Energy efficiency improves because lights only run when needed. Geofencing can turn off exterior lights automatically when everyone leaves, and timers prevent lights from burning all night after someone forgets to flip the switch.
Convenience means no more walking to the garage in the dark or fumbling for switches with arms full of groceries. Voice commands, scheduled sunset-to-sunrise operation, and integration with other smart home devices (like cameras or door locks) streamline daily routines.
Cost savings add up over time. While a smart switch runs $25–$80 depending on features, it works with existing LED bulbs and fixtures, avoiding the recurring cost of smart bulbs that need individual replacement. For circuits controlling multiple outdoor fixtures, one switch manages them all.
Key Features to Look for in an Outdoor Smart Light Switch
Not all smart switches suit outdoor applications. The switch itself typically mounts inside a protected junction box, but the circuit it controls runs to exterior fixtures exposed to weather, moisture, and temperature swings.
Compatibility with existing wiring is critical. Most smart switches require a neutral wire (white wire in the junction box). Older homes built before the 1980s often lack neutrals in switch boxes, which limits options to specific models designed for two-wire installations (hot and load only). Check the box before buying.
Protocol determines how the switch communicates. Wi-Fi switches connect directly to a home network without extra hubs, making them easy to install but potentially congesting bandwidth if dozens are added. Zigbee and Z-Wave switches require a compatible hub (like SmartThings, Hubitat, or a dedicated brand hub) but create mesh networks that extend range and reduce Wi-Fi strain.
Load capacity matters for circuits powering multiple fixtures. Standard smart switches handle 150–600 watts of incandescent or 150W of LED/CFL lighting. Calculate total wattage of all fixtures on the circuit, eight 10W LED bulbs draw 80W total, well within range. Exceeding capacity causes overheating and switch failure.
Voice assistant integration with Alexa, Google Assistant, or Apple HomeKit allows hands-free control. Check compatibility before purchasing: not all switches support all platforms.
App features vary by brand. Look for scheduling (sunrise/sunset automation), geofencing (triggers based on phone location), and scene creation (grouping multiple devices). Some apps track energy usage, though this is less common on basic models.
Weather Resistance and Durability Ratings
While the smart switch installs indoors, the outdoor fixtures it controls face harsh conditions. Verify that existing outdoor fixtures have adequate IP (Ingress Protection) ratings, at minimum IP65 for rain resistance, IP66 or higher for pressure washing or heavy storms. Fixtures in coastal areas benefit from corrosion-resistant materials like powder-coated aluminum or stainless steel.
The switch itself should install in a weather-resistant junction box if mounted in a garage, covered porch, or other semi-exposed location. Standard indoor boxes suffice for switches inside the home controlling exterior lights.
Temperature tolerance affects reliability. Quality switches operate in -4°F to 104°F ranges, suitable for most climates. Extreme heat (attics in southern states) or cold (unheated garages in northern winters) may require switches rated for extended ranges or relocation to climate-controlled spaces.
Top Smart Light Switch Options for Outdoor Use
Several models balance features, compatibility, and ease of installation for outdoor lighting circuits.
Lutron Caseta remains a top choice for reliability. The system uses a proprietary wireless protocol requiring the Caseta Smart Bridge hub, but it works without a neutral wire, ideal for older homes. Compatibility includes Alexa, Google Assistant, and Apple HomeKit. The dimmer versions handle up to 150W of dimmable LED/CFL loads and integrate with Lutron’s Pico remote controls for physical operation without reaching for a phone.
TP-Link Kasa Smart Switch (HS200) offers straightforward Wi-Fi connectivity without a hub. It requires a neutral wire and works with Alexa and Google Assistant (no native HomeKit support). The Kasa app provides scheduling, away mode (randomized lighting), and timer functions. At around $15–$25 per switch, it’s budget-friendly for multi-switch installations.
GE Cync Smart Switch (formerly C by GE) operates via Wi-Fi or Bluetooth depending on the model. Newer versions support Matter, the emerging smart home standard designed for cross-platform compatibility. Requires a neutral wire and handles standard lighting loads up to 150W LED. The Cync app includes geofencing and scheduling, and integration with voice assistants is solid.
Leviton Decora Smart Wi-Fi Switch brings commercial-grade build quality to residential use. Requires a neutral wire, supports up to 300W LED, and connects via Wi-Fi. The My Leviton app allows scheduling and remote control, with Alexa and Google Assistant compatibility. Leviton’s reputation in electrical components translates to durable hardware.
For those invested in Zigbee or Z-Wave ecosystems, Inovelli and Zooz offer feature-rich switches with scene control, LED notification bars, and advanced automation capabilities. These require a compatible hub but excel in complex automated lighting setups involving multiple devices and conditional triggers.
Step-by-Step Installation Guide for Outdoor Smart Switches
Installing a smart switch parallels replacing a standard switch, with a few extra steps for wiring and setup. Most DIYers with basic electrical experience can complete this in 30–60 minutes per switch.
Safety Precautions and Wiring Basics
Turn off power at the breaker panel. Flip the breaker controlling the outdoor lights, then verify power is off by testing the existing switch with a non-contact voltage tester. Test both the switch and the fixture to ensure the entire circuit is dead. Don’t rely on the switch position alone.
Wear safety glasses to protect against debris when removing the old switch. If working in a damp location (garage, covered porch), ensure the floor is dry and consider wearing rubber-soled shoes for added insulation.
Identify wires in the junction box. Standard configurations include:
- Black (hot): Carries power from the breaker
- White (neutral): Completes the circuit (required for most smart switches)
- Red or second black (load): Runs to the light fixture
- Bare copper or green (ground): Safety ground
Some boxes contain multiple cables. Use a voltage tester to identify which black wire carries power (the line), and which runs to the fixture (the load). Labeling wires with tape before disconnecting the old switch prevents confusion.
Steps:
- Remove the wall plate and unscrew the existing switch from the junction box.
- Pull the switch out gently without touching wires. Photograph the existing wiring configuration for reference.
- Test all wires with the voltage tester to confirm power is off.
- Disconnect wires from the old switch. Loosen terminal screws or release push-in connectors.
- Connect the smart switch following the manufacturer’s wiring diagram (usually included in the box):
- Attach the ground wire (green or bare copper from the switch) to the ground bundle or ground screw in the box
- Connect the neutral wire (white from the switch) to the white wire bundle using a wire nut
- Connect the line wire (black from the switch) to the hot wire from the breaker
- Connect the load wire (remaining black or colored wire from the switch) to the wire running to the fixture
- Tuck wires carefully into the box, ensuring no bare copper is exposed and wires aren’t pinched.
- Mount the smart switch to the junction box using the provided screws. Don’t overtighten, which can crack the housing.
- Attach the wall plate and restore power at the breaker.
- Test operation by manually pressing the switch button. The light should turn on and off.
If the switch doesn’t power on or behaves erratically, turn off the breaker and recheck connections. Reversed line and load wires are a common mistake that prevents proper operation but won’t usually trip the breaker.
When to call a pro: If the junction box lacks a neutral wire and the chosen switch requires one, retrofitting involves running new cable, a job best left to a licensed electrician. Similarly, if the load exceeds the switch rating or multiple three-way switches control the lights, professional help ensures code compliance and safety.
Setting Up Automation and Smart Controls
Physical installation is only half the job. Configuring automation unlocks the real benefits of a smart switch.
Initial pairing varies by protocol. Wi-Fi switches typically require downloading the manufacturer’s app, creating an account, and following prompts to connect the switch to the home network. The app scans for new devices, and the user selects the home Wi-Fi SSID and enters the password. The switch blinks or changes LED color to confirm pairing.
Zigbee and Z-Wave switches pair through the hub’s app. Put the hub in pairing mode, then activate the switch’s pairing function (often holding the on button for several seconds). The hub detects the new device and adds it to the network.
Sunset/sunrise scheduling is essential for outdoor lights. Most apps offer this feature, which adjusts automatically based on the home’s geographic location. Set lights to turn on 15 minutes before sunset and off at 11 PM, or keep them on until sunrise for all-night illumination.
Geofencing triggers lights based on phone location. When the last person leaves a predefined radius around the home, outdoor lights turn off. When someone returns, they turn on automatically. This requires granting the app location permissions.
Voice control setup depends on the assistant. For Alexa, enable the switch manufacturer’s skill in the Alexa app, link accounts, and discover devices. For Google Assistant, link the account in the Google Home app. Apple HomeKit devices often pair via a QR code or eight-digit setup code.
Assign the switch a descriptive name like “Front Porch Light” or “Driveway Floods” rather than generic labels. This makes voice commands intuitive (“Alexa, turn on the front porch light”).
Scenes group multiple devices for one-touch control. A “Good Night” scene might turn off all outdoor lights, lock smart locks, and arm the security system. An “Away Mode” scene randomizes outdoor light timing to simulate occupancy.
According to recent testing by CNET, smart switches integrated with broader home automation systems show significantly higher user satisfaction than standalone installations. Similarly, reviews from Digital Trends highlight that multi-platform compatibility reduces friction when ecosystems expand.
Troubleshooting common issues:
- Switch won’t connect to Wi-Fi: Verify the router operates on 2.4 GHz (most smart switches don’t support 5 GHz). Move closer to the router during setup. Check for special characters in the Wi-Fi password that may cause pairing failures.
- Lights flicker or don’t dim smoothly: Ensure LED bulbs are dimmable if using a dimmer switch. Incompatible bulbs cause flickering. Adjust the dimmer’s minimum brightness setting in the app.
- Delayed response: Wi-Fi congestion or weak signal strength slows commands. Consider adding a mesh Wi-Fi node near the switch or switching to a hub-based protocol.
- Automation doesn’t trigger: Check that location services are enabled for geofencing. For sunset/sunrise schedules, confirm the app has the correct home address.
For homes with extensive outdoor lighting, integrating switches with security cameras and motion sensors creates layered automation. Motion detected on the driveway camera triggers flood lights, recorded by the camera with better illumination. Buying guides from Tom’s Guide regularly feature such integrated setups as best practices for smart home security.
Smart switches also work in three-way configurations (lights controlled from two locations) with compatible companion switches or add-on switches sold by the manufacturer. Standard three-way wiring won’t work with a single smart switch: the second location needs a coordinating device that communicates with the smart switch rather than directly interrupting the circuit.