Table of Contents
ToggleSmart outdoor lighting has evolved from simple motion-sensor floodlights to sophisticated control systems that sync with your daily routine, weather patterns, and home security setup. For homeowners tackling exterior upgrades, these systems offer practical benefits: reduced energy bills, improved security, and the ability to control lights from anywhere without fumbling for switches in the dark. But navigating the options, WiFi protocols, voltage requirements, and compatibility, can get confusing fast. This guide breaks down outdoor smart lighting control systems with a focus on what actually matters for installation, performance, and long-term reliability.
Key Takeaways
- Outdoor smart lighting control systems connect networked fixtures and switches via WiFi, Zigbee, or Z-Wave to enable remote operation, scheduling, and automation from your smartphone or voice assistant.
- Smart outdoor lighting reduces energy consumption by 75-80% compared to traditional incandescent bulbs, saves on maintenance through LED longevity, and enhances security by simulating occupancy when homeowners are away.
- Choose between WiFi-based systems for easy setup, mesh-networking protocols like Z-Wave for large properties, and motion sensors with customizable triggers to maximize both efficiency and security.
- Ensure outdoor smart lighting fixtures meet IP65 or higher ratings for weather resistance, verify your existing electrical infrastructure supports the system, and confirm compatibility with your smart home ecosystem (Alexa, Google Home, or Apple HomeKit).
- For DIY installation, always use GFCI protection, confirm neutral wires are available in switch boxes, and test all connections via app before finalizing to prevent common connectivity issues.
What Are Outdoor Smart Lighting Control Systems?
Outdoor smart lighting control systems are networked fixtures and switches that allow remote operation, scheduling, and automation of exterior lights through wireless protocols. Unlike traditional photocell timers or manual switches, these systems connect to a home network, typically via WiFi, Zigbee, or Z-Wave, and communicate with a central hub, smartphone app, or voice assistant.
The hardware includes smart bulbs (LED modules with integrated wireless chips), smart switches (replacing standard wall switches), plug-in smart outlets for string lights or landscape fixtures, and dedicated hubs that coordinate multiple devices. Most systems run on standard 120V AC household power for wall-mounted fixtures or 12V DC low-voltage wiring for path lights and landscape spots.
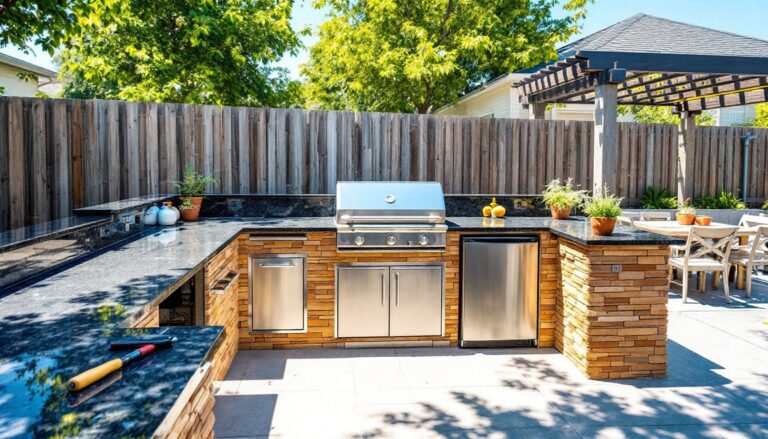
Key distinction: A smart bulb can be controlled individually but requires constant power at the switch. A smart switch controls all downstream fixtures from one point, even if the bulbs are standard LEDs. For outdoor use, the fixture’s IP rating matters, look for IP65 or higher to withstand rain, snow, and hose spray. Systems labeled for outdoor use should have weatherproof junction boxes and corrosion-resistant wiring.
Many modern setups integrate with broader smart home automation, allowing lights to trigger based on door locks, security cameras, or indoor activity. This interoperability is what separates a true control system from a single smart bulb plugged into an outdoor socket.
Key Benefits of Installing Smart Outdoor Lighting
Energy Savings and Efficiency
LED smart fixtures consume 75-80% less energy than incandescent bulbs and last 25,000+ hours. Scheduling and automation prevent lights from running all night, common with manual switches left on. Dimming capability (available on most smart LEDs) further reduces consumption. Expect 10-15 watts per bulb versus 60+ watts for older outdoor floods.
Enhanced Security and Deterrence
Randomized schedules and motion-triggered lighting create the appearance of occupancy when homeowners are away. Integration with security cameras and doorbell systems means lights can activate automatically when motion is detected near entry points. Floodlights with adjustable sensitivity help differentiate between a raccoon and a person.
Convenience and Remote Access
Control lights from anywhere via smartphone app, useful for checking if garage lights were left on or illuminating the driveway before arriving home. Voice control through Alexa, Google Assistant, or Siri eliminates the need to find switches in the dark. Geofencing (GPS-based triggers) can turn lights on as the homeowner’s vehicle approaches.
Increased Property Value and Curb Appeal
Professional-looking landscape lighting and programmable accent lights enhance nighttime aesthetics. According to recent reviews of outdoor smart lights, systems with tunable white or RGB color options appeal to buyers looking for modern, tech-integrated homes. Well-planned exterior lighting also improves safety along walkways and stairs.
Reduced Maintenance
LED longevity and remote diagnostics mean fewer bulb changes and troubleshooting trips to outdoor fixtures. Some systems send alerts when bulbs fail or connectivity drops, allowing proactive repairs.
Types of Outdoor Smart Lighting Control Technologies
WiFi and App-Based Control Systems
WiFi-based smart lights connect directly to the home’s 2.4 GHz network (most avoid 5 GHz due to range limitations). Each fixture communicates with a cloud server, accessed via the manufacturer’s app. No separate hub is required, simplifying installation, but every device adds load to the router. For large properties with multiple outdoor zones, this can strain bandwidth.
Pros: Easy setup, no hub cost, widely compatible with voice assistants.
Cons: Dependent on internet connectivity: cloud outages can disable remote access. Range may be limited for detached garages or far corners of the yard.
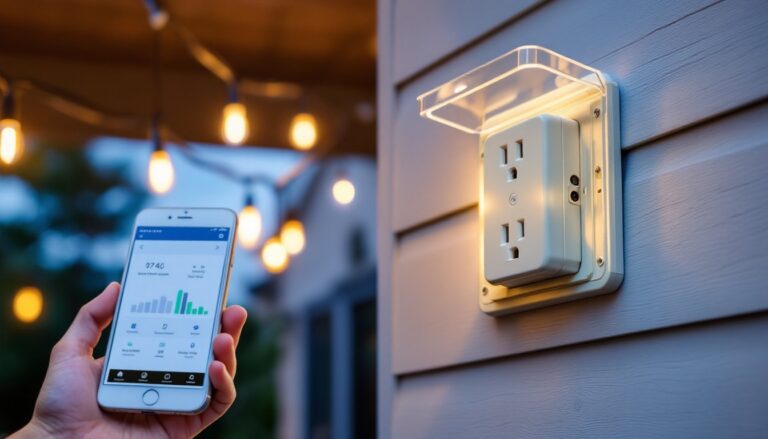
Common products: Brands like Ring, Wyze, and TP-Link Kasa offer WiFi-based outdoor floodlights, string lights, and pathway fixtures. These typically require a GFCI-protected outlet or hardwired connection to weatherproof junction boxes. Make sure the router signal reaches the installation point, consider a WiFi extender or mesh system for distant locations.
Motion Sensors and Automated Triggers
Motion-sensing smart lights use passive infrared (PIR) sensors to detect heat signatures within a defined range (typically 20-40 feet, with adjustable angles). More advanced models incorporate microwave or dual-technology sensors that reduce false triggers from wind-blown branches or small animals.
Automation goes beyond motion: Dusk-to-dawn photocells turn lights on at sunset and off at sunrise. Timers create fixed schedules (e.g., porch lights on from 6 PM to 11 PM). Geofencing uses smartphone GPS to activate lights when residents arrive. Weather-based triggers (via integration with smart home platforms) can increase brightness during storms or fog.
Many systems combine multiple triggers. For example, a pathway light might stay dimmed at 20% from dusk to midnight, then switch to motion-activated full brightness until dawn. This layering maximizes security and efficiency. Expert-tested outdoor smart lighting systems often include customizable sensitivity and duration settings to fine-tune behavior.
Installation note: Motion sensors require a clear line of sight and should be mounted 6-10 feet high to optimize detection without triggering on pets. Avoid aiming sensors toward heat sources like dryer vents or reflective surfaces that cause false positives.
How to Choose the Right System for Your Home
Assess Your Existing Infrastructure
Start by mapping current outdoor electrical circuits. If you have 120V line-voltage fixtures (standard porch lights, garage floods), smart switches or smart bulbs are straightforward replacements. For 12V landscape lighting (path lights, spotlights), you’ll need a compatible smart transformer that controls the entire low-voltage circuit.
Check breaker capacity: Adding multiple smart fixtures shouldn’t exceed 80% of the circuit’s rated amperage. A typical 15-amp outdoor circuit can handle roughly 1,440 watts, plenty for LEDs, but verify if the circuit also powers outlets or other loads.
Match Protocol to Your Smart Home Ecosystem
If you already use Alexa or Google Home, prioritize WiFi or Zigbee devices with native integration. Apple HomeKit users should confirm devices support the Matter standard (launched in late 2022, gaining traction in 2024-2026) for cross-platform compatibility. Z-Wave requires a hub (SmartThings, Hubitat) but offers strong mesh networking for large properties.
Consider Range and Coverage
WiFi range outdoors is roughly 50-100 feet from the router, less through walls. For detached structures, mesh systems or dedicated outdoor access points help. Zigbee and Z-Wave create mesh networks, each powered device extends the signal, improving reliability at the cost of initial complexity.
Evaluate Weather Resistance and Build Quality
IP ratings matter: IP65 resists water jets, IP66 handles heavy rain, and IP67 can withstand temporary submersion. Metal housings resist UV degradation better than plastic. Look for fixtures with powder-coated aluminum or stainless steel hardware in coastal or high-humidity areas.
Budget for Scalability
Smart bulbs cost $10-$30 each: smart switches run $20-$50 and control multiple fixtures. Low-voltage smart transformers for landscape systems range $80-$200. Hubs add $50-$150. Start with high-priority zones (entry, garage, backyard) and expand as budget allows. Comparisons in outdoor smart lighting guides often highlight cost-per-zone for different configurations.
Installation Tips for DIY Homeowners
Safety and Permitting
Turn off power at the breaker before working on any 120V fixture. Use a non-contact voltage tester to confirm the circuit is dead. Outdoor electrical work may require a permit depending on local codes, check with your building department. Installing new circuits or modifying service panels should be handled by a licensed electrician.
Always use GFCI protection on outdoor circuits. This is required by the National Electrical Code (NEC) for outdoor receptacles and fixtures within 6 feet of grade. If your existing outdoor outlets aren’t GFCI, replace them before adding smart devices.
Step-by-Step for Smart Switch Installation
-
Remove the old switch: Unscrew the cover plate and switch. Note which wire is the line (hot, usually black), which is the load (to fixture), and identify the neutral (white) and ground (green or bare copper). Many smart switches require a neutral wire, older homes may lack one in the switch box.
-
Connect the smart switch: Follow manufacturer wiring diagrams. Typically: line to “line,” load to “load,” neutral to neutral bundle, ground to ground. Use wire nuts rated for outdoor (even if inside a weatherproof box) and wrap connections with electrical tape.
-
Secure and test: Mount the switch, restore power, and test via app before closing the box. Ensure the switch firmware updates, many ship with outdated software.
Low-Voltage Landscape Lighting
For 12V systems, replace the standard transformer with a smart model. These plug into a GFCI outlet and control all downstream fixtures. Run 14-gauge or 12-gauge outdoor-rated wire (not lamp cord) to minimize voltage drop, each 100 feet can lose 2-3 volts. Bury cable at least 6 inches deep per NEC, or use conduit where exposed.
WiFi Smart Bulbs in Existing Fixtures
Screw in the bulb, ensure the fixture’s switch is always on, and pair via app. For outdoor fixtures with photocells or built-in timers, disable or bypass those controls, they’ll interfere with smart operation. Confirm the fixture’s enclosure is rated for damp or wet locations: not all indoor smart bulbs are approved for outdoor use even if the fixture is weatherproof.
Mounting and Positioning Tips
- Mount floodlights and motion sensors 8-12 feet high for optimal detection and coverage.
- Angle path lights downward to reduce glare and light trespass onto neighbors’ properties.
- Use silicone sealant around mounting screws and cable entries to prevent water infiltration.
- For wireless smart bulbs in hard-to-reach soffits, consider fixtures with removable panels for easier bulb changes.
Integration with Automated Lighting Systems
Once installed, connect outdoor lights to scenes or routines. For example: “Arrive Home” scene turns on driveway, porch, and garage lights at 50% brightness. “Goodnight” scene dims all outdoor lights to 10% at 11 PM, then activates motion sensing. Incorporating outdoor lighting into broader smart tech solutions enables advanced triggers, like flashing porch lights when the doorbell rings or coordinating with indoor lighting for seamless transitions.
Troubleshooting Common Issues
- Connectivity drops: Check WiFi signal strength: add a mesh node or switch to Zigbee/Z-Wave.
- Lights unresponsive after power outage: Most smart bulbs default to “on” after power loss, disable this in settings if using smart switches.
- Motion sensor false triggers: Adjust sensitivity, reposition away from heat sources, or enable “pet immunity” modes if available.