Table of Contents
ToggleOutdoor lighting used to mean screwing in a bulb by the garage and hoping it lasted through winter. Not anymore. Smart LED outdoor lighting has turned exterior illumination into a programmable, energy-sipping system that responds to schedules, motion, and even voice commands. Whether you’re looking to highlight a pathway, boost security, or just stop fumbling for keys in the dark, these systems deliver control and efficiency that traditional fixtures can’t match. This guide walks through what smart LED outdoor lighting actually is, why it’s worth the upgrade, and how to choose and install the right setup for your home.
Key Takeaways
- Smart LED outdoor lighting reduces energy consumption by up to 75% compared to incandescent bulbs, saving $6–$7 annually per fixture.
- Motion sensors, geofencing, and remote app control boost home security while enabling convenient scheduling and voice-activated lighting.
- Choose connectivity based on your setup: Wi-Fi is simple for small systems, Zigbee creates reliable mesh networks, and solar works best in well-lit areas.
- Verify IP65 or IP66 weather ratings and operating temperature ranges to ensure smart LED outdoor lighting withstands your climate.
- DIY installation works for low-voltage and solar systems, but hardwired 120V fixtures require GFCI protection and may need a licensed electrician for code compliance.
What Is Smart LED Outdoor Lighting and Why It Matters
Smart LED outdoor lighting combines LED bulbs with wireless connectivity, typically Wi-Fi, Zigbee, or Bluetooth, allowing homeowners to control fixtures remotely via smartphone apps or voice assistants like Alexa, Google Assistant, or Apple HomeKit. Unlike traditional outdoor lights that operate on simple timers or photocells, smart systems offer scheduling, dimming, color changes, and integration with other smart home devices.
The “smart” component lives either in the bulb itself or in a compatible fixture with built-in controls. Some systems require a hub (a small bridge device that connects to your router), while others connect directly to Wi-Fi. LEDs are the standard here because they draw minimal power, typically 9–15 watts compared to 60–100 watts for incandescent bulbs, and last 25,000–50,000 hours, roughly 25 times longer than old-school bulbs.
Why does this matter for outdoor spaces? Exterior lighting pulls double duty: it needs to be reliable for security and functional for daily use, but it’s also exposed to weather, temperature swings, and the occasional bird nest. Smart LEDs handle these conditions while giving you the flexibility to adjust brightness during a backyard party or trigger lights when motion is detected. Plus, because they’re programmable, you’re not burning energy all night when you only need light from dusk until 11 PM.
Key Benefits of Upgrading to Smart LED Outdoor Lights
Energy efficiency tops the list. LEDs use about 75% less energy than incandescent bulbs, and smart controls let you automate on/off cycles so lights aren’t running unnecessarily. A typical 10-watt LED outdoor floodlight costs around $1.20 per year to run if used four hours a night, compared to $7–$8 for a 60-watt incandescent.
Security gets a serious boost. Motion-activated floodlights and color-changing LEDs can simulate occupancy when you’re away. Geofencing features turn lights on as you pull into the driveway, and integration with security cameras means you can sync lighting with alerts. Some systems let you set randomized schedules so it doesn’t look like a robot lives in your house.
Convenience and customization make daily life smoother. You can dim pathway lights for a softer look, set warm white for the porch and cool white for the driveway, or schedule sunset-to-sunrise operation without ever touching a switch. Voice control means you can turn on the backyard lights from inside the house when the dog needs to go out.
Longevity and low maintenance matter outdoors. LED bulbs rated for outdoor use are built to handle moisture, dust, and temperature extremes (look for an IP65 or IP66 rating for weather resistance). Because they last decades, you’re not climbing ladders to replace bulbs every year. Many smart fixtures are also designed for automated lighting integration, which streamlines whole-home control.
Types of Smart LED Outdoor Lighting Solutions
Pathway and Landscape Lighting
Pathway lights guide foot traffic and accent landscaping. Smart LED path lights typically run on 12-volt low-voltage systems or are solar-powered with smart controls. Low-voltage kits include a transformer that steps household 120V down to 12V, making them safer to install and less expensive to operate.
Stakes or posts keep lights at ground level, usually 18–24 inches tall. Spacing depends on the fixture’s lumen output, 100–200 lumens per light is common for pathways, with fixtures placed every 6–10 feet. Smart versions let you adjust brightness and color temperature, so you can shift from bright white for visibility to amber for ambiance.
Landscape lighting includes spotlights for trees or architectural features and well lights recessed into the ground. These often use 3–10 watts per fixture. Smart controls allow you to set scenes, say, uplighting the oak tree in warm white while washing the front wall in cool white, and schedule them to turn on at dusk.
Solar-powered smart path lights are available but check the battery capacity and panel size. Cheaper units struggle in shaded yards or during winter. If you’re in a region with less than 4–5 hours of direct sunlight daily, low-voltage wired systems are more reliable.
Security and Floodlights
Smart LED floodlights combine high-lumen output, 1,500 to 3,000 lumens is typical, with motion sensors, cameras, and connectivity. These replace traditional halogen or metal halide floods, which draw 150–300 watts and burn out in 2,000–6,000 hours. A 20-watt smart LED floodlight delivers equivalent brightness at a fraction of the energy cost.
Most smart floods mount to a standard electrical junction box and connect to 120V household wiring. If you’re replacing an existing flood, installation is straightforward: turn off the breaker, disconnect the old fixture, and wire the new one (black to black, white to white, green or bare copper to ground). Always verify the circuit is dead with a non-contact voltage tester before touching any wires.
Motion detection range varies, 30 to 70 feet is common. Adjustable sensitivity prevents false triggers from tree branches or small animals. Some models offer zone detection, letting you define areas within the camera’s field of view that activate the light. Recent smart outdoor light reviews highlight models with customizable motion zones and integrated cameras.
Color-changing RGB+W (red, green, blue, plus white) floodlights let you set accent colors for holidays or events, then switch back to bright white for security. This flexibility is useful for homeowners who want one fixture to serve multiple roles. Leading smart floodlight options often include built-in sirens and two-way audio for added security.
How to Choose the Right Smart LED Outdoor Lighting System
Start by mapping your lighting zones: entry and garage, pathways and steps, backyard or patio, and security-critical areas like side gates. Each zone has different lumen and coverage needs. A front door fixture might need 800–1,200 lumens, while a path light works fine at 100–150 lumens.
Decide on connectivity: Wi-Fi systems are simple, no hub required, but can overload your router if you install dozens of lights. Zigbee or Z-Wave systems require a hub but create a mesh network where each device extends range. Bluetooth works for small setups (a few fixtures within 30 feet of your phone) but lacks remote control when you’re away.
Check compatibility with your existing smart home ecosystem. If you’re already using Alexa, Google Home, or Apple HomeKit for indoor devices, choose outdoor lights that integrate seamlessly. Not all brands play nice with all platforms, so confirm compatibility before buying.
Weather rating is non-negotiable. Look for IP65 (dust-tight, protected from water jets) or IP66 (dust-tight, protected from powerful water jets) for most climates. If you’re in a coastal or very wet area, IP67 (submersion-resistant up to 1 meter) is safer. Also check the operating temperature range, many smart LEDs handle -4°F to 122°F, but verify if you’re in an extreme climate.
Lumen output and color temperature define the light quality. For security and task lighting, 3,000–5,000K (cool white to daylight) and higher lumens work best. For ambiance and landscaping, 2,700–3,000K (warm white) feels more inviting. Tunable white or RGB+W fixtures let you adjust on the fly.
Finally, consider power source. Hardwired (120V) fixtures are the most reliable but require electrical boxes and may need an electrician if you’re adding new circuits. Low-voltage (12V) systems are DIY-friendly and safer, but you’ll need a transformer. Solar is the easiest install but depends on sun exposure and battery performance. Evaluating top-rated smart outdoor lights can help narrow down which power and control options fit your project.
Installation Tips for DIY Homeowners
Safety first: If you’re working with 120V wiring, shut off power at the breaker and confirm it’s dead with a non-contact voltage tester. Outdoor electrical work must comply with the National Electrical Code (NEC), specifically, all outdoor outlets and fixtures should be GFCI-protected. Check local codes: some jurisdictions require a permit for new exterior circuits or fixtures.
For hardwired fixtures (floodlights, porch lights), you’ll need a weatherproof junction box, wire nuts rated for outdoor use, and silicone caulk to seal around the mounting plate. If the fixture doesn’t come with a gasket, add a bead of caulk between the backplate and the wall to prevent water infiltration. Route cable through conduit if it’s exposed: UF (underground feeder) cable is code for buried runs.
Low-voltage pathway lighting kits include a transformer that plugs into a GFCI outlet or hardwires into a junction box. Mount the transformer near the power source, then run the low-voltage cable to each fixture. Bury cable 6 inches deep or run it along fence lines and mulch beds. Use waterproof wire connectors at each splice, twist-on connectors aren’t enough outdoors.
Stake lights into the ground firmly: loose fixtures tilt over time. If soil is hard, soak it first or pre-drill pilot holes. Space fixtures evenly and test before burying cable.
For solar lights, placement is everything. Panels need 4–6 hours of direct sun daily. Avoid shaded spots under eaves or trees. Clean panels every few months, dust and pollen cut efficiency by 20–30%.
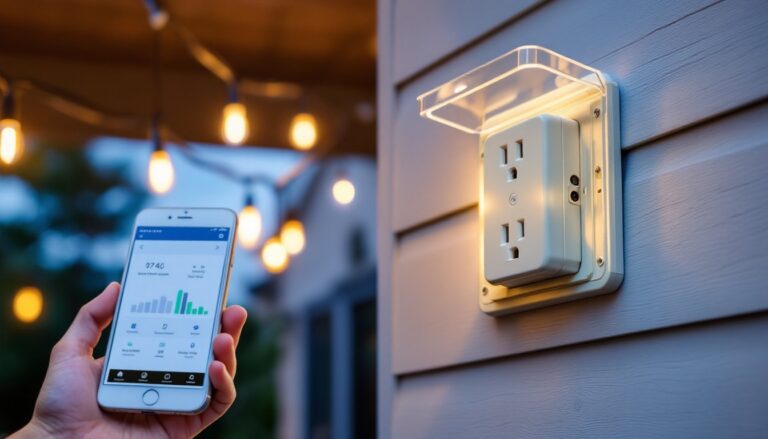
Pairing and setup: Most smart lights use an app for initial configuration. Have your Wi-Fi password ready and follow the manufacturer’s steps, usually a power cycle or button press to enter pairing mode. If you’re using a hub, connect it to your router first. Group lights by zone (“Front Yard,” “Backyard”) for easier control.
Test the system before sealing everything up. Check motion sensitivity, adjust schedules, and confirm connectivity. Walk through coverage areas at night to verify brightness and spacing. If a fixture flickers or doesn’t respond, check connections and confirm it’s within range of your router or hub.
Maintenance: LED smart lights are low-maintenance, but fixtures still collect dirt, cobwebs, and debris. Clean lenses and sensors twice a year. Check mounting hardware annually, expansion and contraction from temperature swings can loosen screws. Update firmware through the app when prompted: manufacturers often release patches for connectivity and security.
If you’re adding new circuits, running cable through walls, or unsure about load calculations, hire a licensed electrician. Outdoor electrical work carries risk, and code violations can affect insurance claims or resale. But for fixture swaps, low-voltage installs, or solar setups, most DIYers with basic tool skills can handle the job safely.