Table of Contents
ToggleBuilding an outdoor kitchen used to mean hiring a contractor, pouring concrete pads, and waiting months for custom masonry work. Now, modular outdoor kitchen kits have changed the game entirely. These pre-engineered systems arrive ready to assemble, with cabinetry, countertops, and appliance cutouts sized to fit together like well-designed puzzle pieces. They’re available in materials ranging from marine-grade polymer to powder-coated steel and stainless steel, offering durability without the custom price tag. For DIYers willing to run a gas line and pour a level foundation, these kits make it possible to install a fully functional outdoor cooking station in a weekend or two.
Key Takeaways
- Modular outdoor kitchen kits reduce installation time from 6–12 weeks to a weekend while costing 30–50% less than custom-built kitchens, ranging from $2,500 to $12,000 for mid-grade systems.
- Material choices—marine-grade polymer, stainless steel, and HDPE—are engineered for weatherproofing and durability, with stainless steel best for humid areas and coastal regions requiring 316-grade to prevent corrosion.
- A level, compacted foundation is non-negotiable for modular outdoor kitchen kits; even 1/4-inch of slope causes doors to malfunction, so invest in a proper concrete slab or reinforced paver base before assembly.
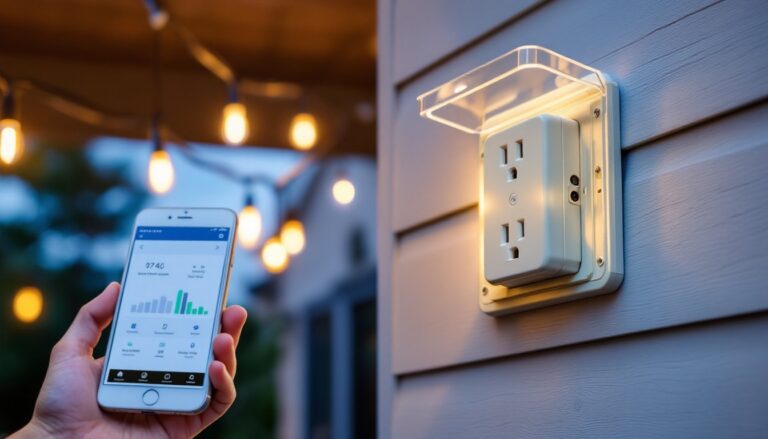
- Utility work—gas lines, electrical outlets with GFCI protection, and water supply—must meet local codes and should be handled by licensed professionals to ensure safety and compliance, budgeting $500–$1,300 for plumbing and electrical hookups.
- Workflow-focused layout with grill as the centerpiece, at least 18 inches of prep counter nearby, and strategic storage for frequently used items optimizes functionality and cooking efficiency.
- Modular outdoor kitchen kits offer expandability, allowing homeowners to start with a basic grill island and add modules like sinks or bar seating over time while maintaining matched aesthetics and profiles.
What Are Modular Outdoor Kitchen Kits and Why Choose Them?
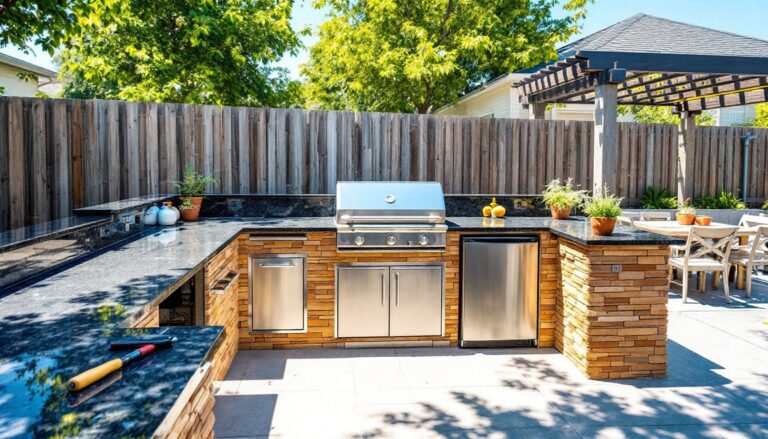
Modular outdoor kitchen kits are prefabricated systems designed for outdoor cooking and entertaining. Each kit typically includes weatherproof cabinets, countertop sections, and cut-to-fit openings for grills, burners, storage drawers, and sinks. The term “modular” refers to the stackable, configurable nature of the components, homeowners can arrange units in straight runs, L-shapes, or U-configurations depending on available space and workflow preferences.
Unlike poured-in-place concrete or custom stone builds, these kits arrive with pre-finished surfaces and standardized dimensions. Common materials include high-density polyethylene (HDPE), marine-grade polymer, 304 or 316 stainless steel, and powder-coated aluminum. HDPE and polymer options resist UV degradation and won’t rust, while stainless models offer a sleek, commercial look and superior heat resistance near cooking zones.
The main appeal is speed and cost. A custom-built outdoor kitchen can run $15,000–$40,000+ and take 6–12 weeks, depending on permitting and contractor availability. Modular kits range from $2,500 to $12,000 for mid-grade systems, and most can be assembled by two people in a weekend once the base is prepared. You’re trading some design flexibility for significant savings and faster project completion.
One important note: while the cabinets and counters are modular, you’ll still need to address utilities. Running a gas line for a built-in grill typically requires a licensed plumber and a permit in most jurisdictions. Electrical outlets for refrigerators or lighting must meet National Electrical Code (NEC) standards for outdoor receptacles, specifically GFCI-protected circuits rated for wet locations.
Key Components Included in Modular Outdoor Kitchen Kits
Understanding what’s in the box helps you compare kits and identify what you’ll need to source separately. Most kits break down into the following components:
Base cabinets: These form the structure and usually measure 24 inches deep by 34–36 inches tall, matching standard indoor kitchen dimensions. Look for fully enclosed backs to keep out critters and rain. Marine-grade polymer cabinets often feature integrated leveling feet, critical for uneven patios.
Countertops: Options include tile-ready cement board, granite or quartz slabs, stainless steel, or poured concrete. Tile-ready surfaces require you to finish with outdoor-rated tile and grout. Pre-cut slabs add cost but arrive ready to install. Verify whether the kit includes finished edges or if you’ll need to order bullnose trim separately.
Appliance cutouts: Pre-sized openings for drop-in grills, side burners, and sinks. Standard grill cutouts run 28–34 inches wide for most built-in models. Double-check your grill’s rough-in dimensions before ordering, some manufacturers measure the cutout, others measure the flange.
Doors and drawers: Stainless steel doors with continuous hinges hold up better than piano hinges in humid climates. Soft-close hardware is a nice upgrade but not essential. Drawers should have sealed glides rated for outdoor use.
Access panels: Critical for reaching gas shut-off valves, electrical junctions, and plumbing connections. Code often requires accessible shut-offs within 6 feet of the appliance.
What’s usually not included: the grill itself, faucets, sinks, refrigerators, and utility hookups. Budget an additional $800–$3,000 for a quality built-in grill, $200–$600 for an outdoor-rated sink and faucet, and $400–$1,200 for a compact outdoor refrigerator if you want one.
Top Benefits of Installing a Modular Outdoor Kitchen
Faster installation: Most kits ship flat-packed and assemble with basic hand tools, socket wrenches, levels, and drills. Compare that to traditional masonry, which requires forming, pouring, curing, and then finishing surfaces. You’re looking at hours instead of weeks.
Lower upfront cost: Mid-tier modular systems cost roughly 30–50% less than equivalent custom builds. You’re eliminating labor for masonry, tile setting, and carpentry. That said, don’t skimp on the foundation. A level, compacted base is non-negotiable, whether it’s a poured slab, pavers over compacted gravel, or a reinforced deck.
Expandability: Start with a basic grill island and add a sink module or bar seating later. Many manufacturers design their lines with matching profiles and finishes, so units added years apart still align. This staged approach spreads out costs and lets you test layouts before committing to a full build.
Weatherproofing built in: Quality kits use materials engineered for sun, rain, and temperature swings. Stainless steel won’t rust (though it can stain if you use harsh cleaners or live near saltwater, opt for 316-grade in coastal areas). HDPE and polymer won’t warp, crack, or fade like painted wood. Compare this to DIY builds using standard plywood and tile, which require meticulous sealing and regular maintenance.
No HOA hassles: In neighborhoods with design review boards, a modular kit often passes faster than a custom structure. Many boards consider them “temporary” or “movable,” even if you bolt them to a slab. Check your CC&Rs before assuming anything, but it’s one less battle.
One downside: resale perception. Some buyers view modular systems as less permanent or premium than custom stonework. In practice, a well-maintained polymer or stainless island with high-end appliances performs identically and lasts just as long. It’s a matter of aesthetics and buyer psychology, not function.
How to Choose the Right Modular Outdoor Kitchen Kit for Your Space
Start by measuring your patio or deck. You’ll need at least 3 feet of clearance behind the cook for safe movement, and ideally 4–5 feet if multiple people will be working at once. If the island backs up to a house wall, check local fire codes, many jurisdictions require 10 inches minimum between a grill and any combustible surface, and some require more for LP tanks.
Material selection depends on climate and aesthetics. In the Pacific Northwest or humid climates, polymer and HDPE resist mildew and won’t corrode. In arid regions with intense sun, stainless steel stays cooler to the touch than dark polymer, though it will show fingerprints and water spots. Powder-coated aluminum splits the difference, lighter than steel, more scratch-resistant than polymer, but the coating can chip if you’re rough with utensils.
Configuration matters. Straight-line islands work well against a fence or wall and suit narrow patios. L-shaped layouts create a natural work triangle (grill, prep sink, refrigerator) and offer bar seating on the outside. U-shaped setups are ideal for larger spaces and serious entertainers but require more square footage, plan on at least 12 × 14 feet to avoid a cramped feel.
Appliance compatibility: Verify rough-in specs before buying. Not all kits accommodate every grill. If you already own a built-in grill, measure the cutout and flange dimensions. Some polymer kits max out at 30-inch cutouts and can’t fit larger 36-inch grills.
Utility access: If you’re adding a sink, you’ll need a water supply and drain. A simple garden hose connection works for cold water, but if you want hot water for cleanup, you’ll need to tap into the house’s hot water line. Drainage typically routes to a gravel dry well for gray water (check local codes, some areas prohibit this). Gas lines must be black iron or approved flexible connectors (CSST), sized for BTU load. Most built-in grills need ½-inch gas line minimum.
Budget for a concrete slab or reinforced paver base. A 4-inch slab with 3,000 PSI concrete and 6×6 W1.4×W1.4 welded wire mesh is standard. Pavers work if installed over 4–6 inches of compacted gravel and a layer of leveling sand, but they can shift over time. Pros often use a geotextile fabric under the gravel to prevent settling.
Installation Tips for DIY Success
Level the base first. Use a 4-foot or 6-foot level and shim cabinets as needed. Even 1/4-inch of slope will cause doors to swing open or shut on their own. Many polymer cabinets have adjustable feet, start all threads evenly, then fine-tune after setting the units in place.
Dry-fit everything before making utility connections. Lay out cabinets, slide in the countertop, and verify all doors and drawers open without binding. This is your chance to catch misaligned cutouts or damaged components while they’re still easy to return.
Anchor to the slab. Wind can tip an unsecured island, especially if it’s top-heavy with a large grill. Use stainless steel masonry anchors or Tapcon screws into concrete. For pavers, you can drill through the unit bases into the gravel bed and use long galvanized stakes, though this is less secure.
Seal all seams. Even “weatherproof” materials benefit from a bead of outdoor-rated silicone where countertops meet cabinets and where modules join. This keeps rain and insects out of the interior.
Hire out the gas and electrical. Yes, you can DIY these if you’re comfortable with codes, but a licensed pro brings liability insurance and knows the inspection process. A failed DIY gas connection is a literal fire hazard. Budget $300–$800 for a plumber to run a gas line and $200–$500 for an electrician to add a GFCI outlet.
PPE for assembly: Wear work gloves when handling stainless panels (sharp edges), safety glasses if cutting or drilling, and knee pads if you’re spending time on concrete. Stainless and powder-coated surfaces scratch easily, lay down a tarp or moving blankets during assembly.
Many woodworking enthusiasts who enjoy building furniture from plans find modular kits a natural fit, since the precision and attention to alignment mirror cabinet-making principles.
Essential Design Considerations and Layout Options
Workflow trumps aesthetics. Position the grill as the centerpiece, with prep space on both sides, at least 18 inches of counter on the side where you’ll plate food, 12 inches minimum on the other. If adding a side burner, place it adjacent to the grill so you can monitor both without turning around.
Bar seating adds functionality. An 18-inch overhang on one side of the island accommodates standard bar stools and creates a spot for guests to hang out without crowding the cook. Structural support underneath is critical, cantilevered granite needs steel brackets or corbels every 24 inches. Stainless or polymer counters are lighter but still benefit from support.
Storage strategy: Keep frequently used items (spatulas, tongs, seasonings) in drawers near the grill. Dedicate a cabinet for propane tank storage if you’re using LP instead of natural gas, make sure it’s vented with louvers top and bottom to prevent gas buildup. Trash pullouts are popular but attract pests if not emptied regularly: consider a sealed drawer-style bin.
Lighting: Task lighting above the grill and prep areas is essential for evening cooking. Low-voltage LED strips under the counter overhang add ambiance and safety. All fixtures must be rated for wet or damp locations (check the UL label). If retrofitting lights after assembly, surface-mount puck lights are easier than running wire through cabinets.
Shade and ventilation: A pergola or roof overhang protects the cook and extends the usable season. If you enclose the cooking area, ensure adequate ventilation, grills produce carbon monoxide. Never use a built-in grill under a fully enclosed porch without a commercial-grade exhaust hood.
Accessibility: If the outdoor kitchen is on a raised deck, account for load ratings. A typical residential deck is built for 40–50 PSF live load. A fully loaded outdoor kitchen (cabinets, countertops, grill, fridge, and people) can exceed this. Have a structural engineer review plans if you’re adding significant weight to an existing deck. Reinforcing with additional joists or posts is often necessary.
For those exploring outdoor living upgrades, pairing a modular kitchen with dedicated dining and lounge zones creates a cohesive backyard environment. Consider how traffic flows between cooking, eating, and relaxation areas to avoid bottlenecks during gatherings.
Conclusion
Modular outdoor kitchen kits deliver professional results without the custom price tag or multi-week timeline. They work best when homeowners invest time in proper foundation prep, utility planning, and accurate measurements upfront. The assembly itself is straightforward for anyone comfortable with basic tools and leveling. Whether starting with a simple grill island or building a full U-shaped setup, these systems make outdoor cooking accessible, expandable, and built to last.