Table of Contents
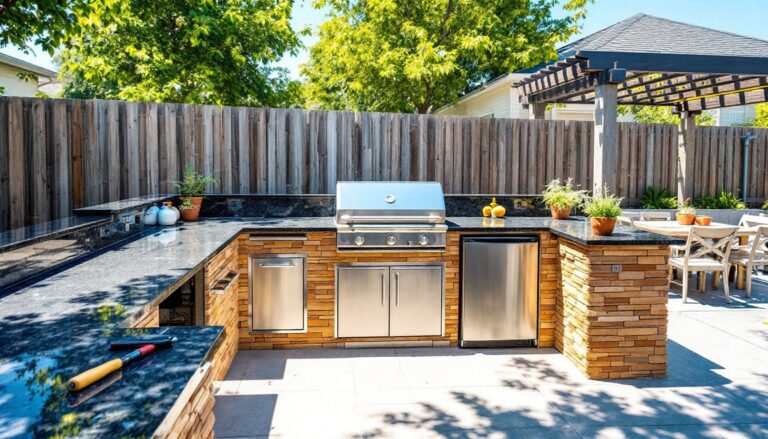
ToggleA kids’ outdoor kitchen transforms an ordinary backyard into an imaginative play zone where children can “cook,” serve mud pies, and host pretend tea parties while parents relax nearby. Unlike indoor play kitchens that take up valuable square footage, an outdoor setup encourages active play, sensory exploration, and extended time in fresh air. Whether building from scratch with reclaimed materials or customizing a store-bought unit, creating a dedicated outdoor cooking space for kids requires thoughtful planning around location, durability, and safety. This guide walks through every decision point, from sizing and material selection to weatherproofing and creative add-ons, so the project delivers years of backyard fun.
Key Takeaways
- A kids outdoor kitchen promotes developmental benefits like creativity, fine motor skills, and social interaction while keeping messy water and mud play confined to the yard.
- Strategic location with parental sightlines and shade protection extends playtime, while sizing the kitchen 24 to 60 inches wide accommodates different age groups and prevents blocking yard traffic.
- Store-bought outdoor kitchens offer quick assembly and consistency ($150–$600+), while DIY builds using reclaimed pallets cost $75–$200 and allow customization for a specific design vision.
- Essential features include adjustable counter heights (24–32 inches depending on child age), accessible storage shelves, functional sinks for water play, and defined stovetop zones to guide realistic pretend cooking.
- Cedar or redwood wood selections resist rot naturally, but pressure-treated lumber and all fasteners must be exterior-grade, with edges sanded and screw heads countersunk to prevent splinters and injuries.
- Themed customizations like farmer’s market stands, pizzeria setups, or plant shelves transform a basic kids outdoor kitchen into an engaging backyard centerpiece that encourages imaginative extended play.
Why Build an Outdoor Kitchen for Kids?
An outdoor kitchen for kids offers developmental benefits that go beyond simple entertainment. Open-ended play in a dedicated cooking space fosters creativity, social skills, and fine motor development as children manipulate utensils, containers, and natural materials like sand, water, and leaves.
Unlike tablet games or screen time, outdoor play kitchens encourage physical activity and imaginative scenarios. Kids practice sharing, negotiation, and role-playing, skills that translate to real-world interactions. Parents gain peace of mind knowing their children are engaged in safe, supervised play that doesn’t involve actual heat sources or sharp implements.
Outdoor kitchens also keep messy activities outside. Water play, mud experiments, and berry “cooking” stay confined to the yard, reducing indoor cleanup. Many families find that a well-designed play kitchen becomes the centerpiece of backyard gatherings, keeping children entertained while adults handle real grilling or dining setups nearby.
Choosing the Right Location and Size
Location determines how much the kitchen gets used. Position it where parents can maintain line-of-sight from a deck, patio, or kitchen window. Avoid isolated corners of the yard that feel disconnected from household activity. Proximity to outdoor party setups or existing play structures encourages integrated play.
Shade and drainage matter. Placing the kitchen under a tree canopy or covered patio extends playtime during midday heat and protects wood or painted surfaces from constant sun exposure. Ensure the ground slopes away from the structure to prevent puddling after rain. A gravel or mulch base provides drainage and reduces mud splatter on play surfaces.
Size depends on user count and yard space. A compact 36-inch-wide unit works for toddlers and single-child households. Families with multiple kids or frequent playdates should consider 48 to 60 inches of counter length to accommodate simultaneous “cooks.” Measure existing play zones to confirm the kitchen won’t block foot traffic or shrink usable lawn area. Leave at least 24 inches of clearance on all sides for movement and seated play.
DIY vs. Store-Bought: Which Option Is Best?
Store-bought outdoor play kitchens offer speed and consistency. Pre-fabricated units from manufacturers like KidKraft or Step2 ship with weather-resistant plastics, pre-drilled assembly holes, and included hardware. Expect assembly in 1 to 3 hours with basic tools. Prices range from $150 for basic models to $600+ for cedar or composite units with functional sinks and storage.
Plastic kitchens resist rot and require minimal maintenance, but they lack customization and can fade in direct sun over 3 to 5 years. Cedar or treated wood models offer a more natural aesthetic and accept paint or stain for personalization, though they require annual sealing to prevent weathering.
DIY builds suit homeowners who want tailored dimensions, reclaimed materials, or a specific design vision. A simple pallet-based kitchen can be completed in a weekend using two 48-by-40-inch pallets, 2×4 framing lumber, and exterior-grade plywood for counters. Total material cost typically runs $75 to $200, depending on hardware and finish choices.
DIY projects demand more planning and tool access. A circular saw, drill/driver, and orbital sander are essential. Outdoor living spaces that incorporate built-in features may benefit from a custom design that matches existing structures. Be honest about skill level, if cutting compound angles or scribing countertops feels daunting, a pre-fab unit saves frustration.
Essential Features and Design Elements
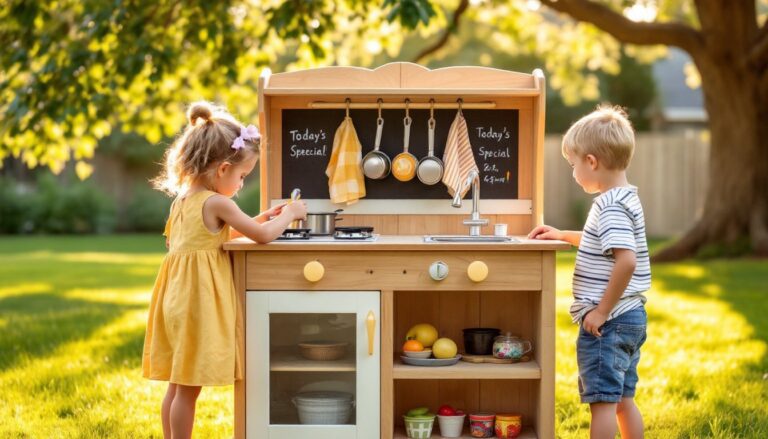
A functional kids’ outdoor kitchen includes three core zones: prep, cook, and serve. Even in play form, these elements guide realistic pretend cooking.
Counter height should match the primary user’s elbow height when standing, typically 24 to 28 inches for preschoolers, 28 to 32 inches for elementary-aged children. Adjustable legs or tiered platforms accommodate growing kids without rebuilding.
Storage shelves or cubbies hold play food, utensils, and containers. Open shelving encourages cleanup habits, while covered bins protect items from rain. Include at least two accessible shelves at child height.
Interactive elements elevate play value:
- Working sink: A plastic basin or stainless pet bowl set into a counter cutout enables water play. Connect to a garden hose with a simple spigot or leave as a pour-in basin to control water use.
- Stovetop burners: Paint circles on the counter or screw down metal trivets to define cooking zones. Some builders add battery-operated LED “flames” beneath acrylic burner covers.
- Hooks and rails: Mount S-hooks on a dowel or metal rail for hanging utensils, towels, or baskets. Side-mounted pegboard expands storage without consuming counter space.
- Chalkboard surfaces: Paint one panel with chalkboard paint to create a menu board. Kids enjoy writing daily specials or taking pretend orders.
Design inspiration from sources like Better Homes & Gardens often includes creative storage solutions adaptable to outdoor play structures.
Materials and Safety Considerations
Wood selection impacts longevity. Cedar and redwood contain natural oils that resist rot and insect damage without chemical treatment, making them ideal for children’s play structures. Expect to pay $8 to $12 per board foot. Pressure-treated pine costs less ($3 to $5 per board foot) but requires kiln-dried after-treatment (KDAT) lumber to avoid chemical leaching concerns around children.
Avoid CCA-treated wood (chromated copper arsenate), which is banned for residential use but occasionally appears in reclaimed materials. If using reclaimed pallets, confirm they’re stamped HT (heat-treated) rather than MB (methyl bromide), which indicates chemical fumigation.
Fasteners and finishes must withstand moisture. Use exterior-grade screws (deck screws or stainless steel) rather than nails, which work loose over time. Apply zero-VOC exterior primer and acrylic latex paint for a child-safe, colorful finish. Seal raw wood with water-based polyurethane or linseed oil to prevent splinters.
Safety checklist:
- Sand all edges to a 1/8-inch radius. Splinters are the most common injury from DIY play structures.
- Countersink screw heads flush with the surface or cover with wood plugs.
- Anchor the structure to the ground using 12-inch steel stakes or concrete footings if the unit exceeds 48 inches in height to prevent tipping.
- Avoid small parts like decorative knobs under 1.25 inches in diameter, which pose choking hazards for children under three.
- Ensure drainage in any basin or container to prevent standing water that attracts mosquitoes.
Design elements borrowed from garden-focused projects emphasize natural materials that blend seamlessly into backyard landscapes while remaining safe for children.
Creative Customization Ideas to Make It Special
Personalization transforms a basic play kitchen into a beloved backyard feature. Paint schemes set the tone, primary colors for a classic diner look, pastels for a cafe vibe, or natural wood tones with bright accents for a modern feel. Use exterior stencils to add patterns, the child’s name, or faux tile backsplashes.
Themed add-ons extend play scenarios:
- Farmer’s market stand: Attach a hinged awning using canvas drop cloth and 1×2 furring strips. Add crates for displaying play produce.
- Pizzeria or taco truck: Mount a small chalkboard menu, install a shelf for condiment bottles, and hang a bell for order pickup.
- Ice cream parlor: Paint a “freezer” door on a lower cabinet, add scoops and bowls, and install a small umbrella overhead for shade.
Functional accessories improve realism without high cost:
- Real sink hardware: Install a secondhand faucet from a habitat restoration store. No plumbing required, it’s purely decorative but kids love the tactile feedback.
- Magnetic knife strip: Mount a magnetic tool holder for metal utensils. It keeps tools accessible and teaches organization.
- Plant shelf: Incorporate a narrow shelf for potted herbs or flowers. Kids can “harvest” real basil or mint for their pretend dishes, connecting play to fun outdoor living and garden education.
- String lights: Battery-operated café lights create ambiance for evening play or backyard parties. Use low-voltage LED strands rated for outdoor use.
Upcycled materials add character. Old cabinet knobs become burner controls. A salvaged oven door (glass removed) becomes a working cabinet. Metal bucket lids screwed to the counter serve as stovetop burners. Check local salvage yards or online marketplaces for inexpensive finds.
Consider incorporating weather-resistant features inspired by outdoor heating solutions if extending playtime into cooler months, though never actual heat sources near children’s play areas.
Conclusion
A well-planned kids’ outdoor kitchen delivers years of creative play while keeping messy activities contained outside. Whether building from scratch or customizing a store-bought unit, focus on durable materials, child-safe construction, and features that encourage imaginative scenarios. The right location, proportional sizing, and thoughtful add-ons transform a simple play structure into a backyard centerpiece that grows with the family.