Table of Contents
ToggleSmart lighting has moved off the porch and into the rain. Outdoor smart light switches bring app control, voice commands, and automation to exterior fixtures, porch lights, garage floods, landscape spots, without rewiring your home’s nervous system. They handle weather, integrate with ecosystems like Alexa or Google Home, and let homeowners schedule lighting around sunsets, motion, or departure times. This guide walks through what makes an outdoor smart switch different from its indoor cousin, which features matter for wet locations, and how to install one without calling an electrician (though you’ll need to cut the power and follow local code).
Key Takeaways
- Outdoor smart light switches add wireless app and voice control to exterior fixtures without requiring home rewiring, while weatherproof enclosures handle moisture, temperature swings, and UV exposure.
- Energy savings come from scheduling and automation—smart switches can turn off after set durations, dim during low-traffic hours, or activate only when motion is detected, saving approximately $6–$8 annually per fixture.
- IP ratings (IP65 for covered areas, IP66–IP67 for open weather) and weatherproof in-use covers are essential; verify compatibility with your ecosystem—Wi-Fi, Zigbee, or Z-Wave—and ensure your home has a neutral wire before installation.
- Installation requires turning off power, connecting the smart switch to line, load, neutral, and ground terminals in the existing electrical box, then securing a weatherproof cover and pairing via the manufacturer’s app or hub.
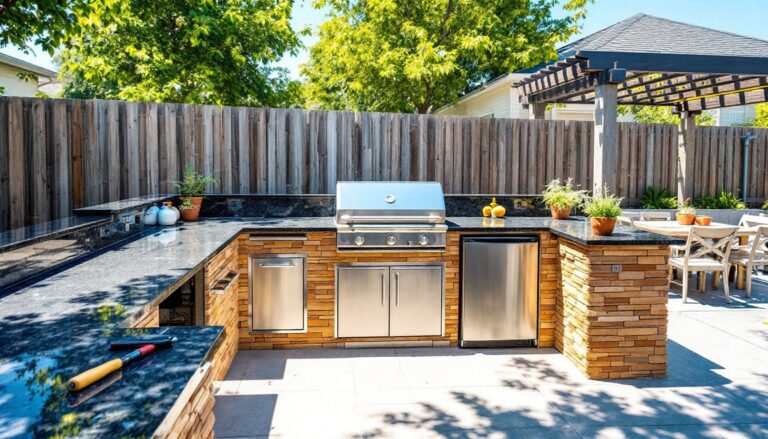
- Outdoor smart light switches excel for porch scheduling, geofencing-triggered driveway floods, automated landscape scenes, pool safety, and seasonal lighting, plus integration with video doorbells and smart locks for advanced automations without custom coding.
What Is an Outdoor Smart Light Switch?
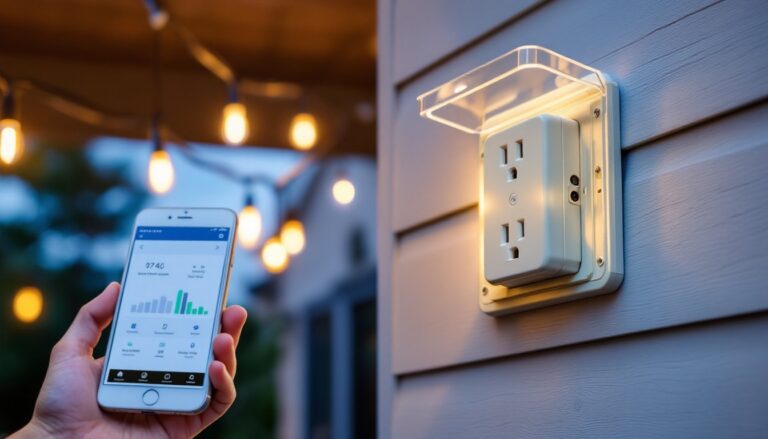
An outdoor smart light switch replaces a standard wall switch and adds wireless connectivity, Wi-Fi, Zigbee, or Z-Wave, so users control lights remotely via smartphone app or voice assistant. Unlike indoor models, outdoor switches live in weatherproof enclosures (in-use covers or NEMA-rated boxes) and include ratings for moisture, temperature swings, and UV exposure.
Most operate on standard 120V household current and fit a single-gang electrical box. They require a neutral wire (the white wire in modern wiring) to power the smart circuitry, which trips up retrofits in older homes where switches were wired with just a hot and a load wire. Some models include a built-in relay that clicks audibly when toggled: others use solid-state switching.
Outdoor switches differ from smart plugs and in-line modules. A switch mounts in the wall box and controls hardwired fixtures. A plug sits in an outlet and controls anything you plug into it. In-line modules install inside the fixture canopy or junction box, useful when the switch location is indoors but the light is outside. For permanent landscape or security lighting, a hardwired switch offers cleaner installation and no dangling adapters.
Key Benefits of Installing Outdoor Smart Light Switches
Remote and scheduled control tops the list. Homeowners can turn on driveway floods from the office parking lot, schedule porch lights to mirror sunset times (adjusting automatically through the year), or trigger all exterior lights when the security system arms. No more wondering if you left the garage light burning.
Energy savings come from automation. Dumb switches stay on until someone remembers to flip them. Smart switches can turn off after a set duration, dim during low-traffic hours, or activate only when motion sensors (integrated or linked via smart hub) detect movement. An 18W LED flood running unnecessarily 8 hours a night wastes roughly 53 kWh per year, around $6–$8 depending on local rates. Multiply by multiple fixtures and the waste adds up.
Enhanced security and convenience matter for exterior lighting. Lights on timers create an occupied appearance during vacations. Geofencing can trigger lights as a car approaches the driveway. Voice control means flipping on the backyard lights without fumbling for a switch while carrying groceries or a ladder. Integration with other smart devices allows scenes: “Good night” turns off all outdoor lights except the front porch, which dims to 20%.
No subscription fees for basic operation. Unlike some security cameras or hubs, most smart switches function fully after the initial purchase. Cloud features (voice control via Alexa, remote access away from home) may require a hub or router, but the core scheduling and app control work offline once configured.
Top Features to Look for When Choosing an Outdoor Smart Light Switch
Weather Resistance and IP Ratings
IP ratings (Ingress Protection) measure resistance to solids and liquids. An IP65 rating means complete dust protection and resistance to water jets from any direction, sufficient for a covered porch or eave. IP66 and IP67 handle stronger jets and brief submersion, better for open patios or areas prone to driving rain.
Most outdoor switches carry an IP rating only when installed in an appropriate in-use cover (a hinged, gasketed box that keeps the device dry even when cables are plugged in or the door is open). A bare switch in a standard interior cover will fail outdoors. Check the manufacturer’s specs: some require a specific cover model to meet the IP rating. Others include the cover in the package.
Operating temperature range matters in climates with hot summers or freezing winters. Many consumer smart switches spec -4°F to 122°F (-20°C to 50°C), adequate for most of the U.S. Extreme cold (northern states, mountain regions) or desert heat can push those limits. UV-resistant housings prevent brittle plastic after years of sun exposure.
Smart Home Compatibility and Connectivity
Protocol choice affects which hub or assistant works. Wi-Fi switches connect directly to the home router and pair with Alexa, Google Home, or Apple HomeKit (if certified). They don’t need a separate hub but can congest the 2.4 GHz band if you install many devices.
Zigbee and Z-Wave switches require a compatible hub (SmartThings, Hubitat, Home Assistant) but form a mesh network, extending range and reducing Wi-Fi load. They’re more reliable in homes with thick walls or distant fixtures. Z-Wave uses a dedicated frequency (908 MHz in the U.S.), avoiding interference from Wi-Fi and Bluetooth.
Voice assistant support varies. Check certification: “Works with Alexa” means voice on/off and dimming (if supported). “Works with Google Home” offers similar control. HomeKit requires a physical chip or software certification and enables Siri control plus tighter privacy standards.
Dimming capability isn’t universal. Verify the switch supports dimming if that’s desired, and confirm compatibility with the connected LED or CFL bulbs. Not all LEDs dim smoothly: some flicker or buzz at low levels. Manufacturer listings often specify minimum and maximum wattage (e.g., 150W incandescent, 50W LED).
Installation Guide: How to Install an Outdoor Smart Light Switch
Safety first: Turn off power at the breaker panel and verify with a non-contact voltage tester. Outdoor circuits may share a breaker with other loads: test the wires even after flipping what you think is the right breaker. Wear safety glasses and work in dry conditions, never install electrical devices in the rain.
Materials and tools needed:
- Outdoor smart switch (matching the load type and protocol)
- Weatherproof in-use cover (if not included)
- Wire nuts or push-in connectors
- Electrical tape
- Non-contact voltage tester
- Screwdrivers (flat and Phillips)
- Wire stripper (if trimming conductors)
- Silicone sealant or foam gasket (for box penetrations)
Step-by-step installation:
- Remove the old switch. Unscrew the cover plate and switch mounting screws. Pull the switch out gently and note wire colors. Standard setup: black (hot/line) connects to one terminal, black or red (load) to another, white (neutral) wirenutted in the box, bare copper (ground) attached to the green screw or box.
- Check for a neutral wire. Smart switches need power even when off. If only two wires (plus ground) enter the box, there’s no neutral. Solutions: run a new 14/3 or 12/3 cable from the fixture or panel, hire an electrician, or use a no-neutral smart switch (rare, higher cost, and limited models).
- Connect the smart switch. Follow the manufacturer’s wiring diagram. Typical connections: line (black from panel) to LINE terminal, load (black to fixture) to LOAD, neutral (white bundle) to NEUTRAL, ground to green screw. Some models use pigtails: others have screw terminals. Keep connections tight and verify no bare copper is exposed outside wire nuts.
- Secure and test. Fold wires neatly into the box (tight fit with smart switches, they’re bulkier than dumb toggles). Screw the switch to the box ears. Restore power and test manual operation (most have a physical button). If the light doesn’t respond, recheck load and line connections (swapping them is a common mistake).
- Install the weatherproof cover. Mount the in-use cover over the switch, threading gaskets around the box opening. Many outdoor setups for automated lighting systems use these covers to maintain IP ratings. Seal any gaps where the cable enters the box with silicone or closed-cell foam to prevent water intrusion.
- Pair with the app or hub. Power-cycle the switch (off for 10 seconds, back on) to enter pairing mode, often indicated by a blinking LED. Open the manufacturer’s app, scan for new devices, and follow prompts. For Zigbee/Z-Wave, initiate pairing from the hub interface.
Permit and code considerations: Replacing a switch like-for-like typically doesn’t require a permit, but verify with the local building department. Work must meet National Electrical Code (NEC) standards: proper box fill, GFCI protection on outdoor circuits (some jurisdictions require GFCI breakers for all exterior lighting), and correct wire gauge for the load. If upgrading an old two-wire system to three-wire, or extending a circuit, a permit and inspection may be required.
Best Use Cases for Outdoor Smart Light Switches
Porch and entryway lighting benefits from scheduling and geofencing. Set lights to turn on at dusk and off at 11 PM on weekdays, staying on until midnight on weekends. Geofencing can trigger them as residents arrive home, providing safety and visibility without manual operation. According to CNET’s review of outdoor smart switches, many models now include adaptive scheduling that adjusts automatically for daylight saving time.
Garage and driveway floods often get left on accidentally. A smart switch with auto-off (“turn off after 15 minutes”) or motion integration solves that. Paired with a motion sensor (wired or wireless), the light activates only when someone approaches and shuts off after a set idle period, saving energy and extending bulb life.
Landscape and accent lighting can be orchestrated into scenes. “Entertaining” turns on path lights, up-lights on trees, and deck strips at 60% brightness. “Security” mode can flash all exterior lights or strobe colors if integrated with a security system. Testing from Tom’s Guide on outdoor smart plugs notes that many systems support grouping multiple switches for synchronized control.
Pool and spa lighting requires GFCI protection (mandated by NEC for wet locations) and often low-voltage fixtures, but the control switch at 120V can be smart. Scheduling ensures the pool light isn’t left on overnight, and voice control offers convenience when hands are wet. Check that the switch’s relay rating handles the transformer load if using low-voltage lighting.
Holiday and seasonal lighting becomes less of a chore. Program the switch to turn on holiday lights from Thanksgiving to New Year’s, 5 PM to 10 PM daily, then disable the schedule the rest of the year. No crawling under the eaves to plug and unplug strands. Digital Trends’ guide to outdoor smart devices highlights this as one of the top reasons homeowners invest in exterior smart controls.
Integration with other devices unlocks advanced scenarios. Combine an outdoor smart switch with a video doorbell: when the doorbell detects motion at night, the porch light ramps to 100% and a notification is sent to the homeowner’s phone. Or link with a smart lock: unlocking the front door after sunset automatically turns on the entryway and path lights for 5 minutes. These automations require a compatible hub (SmartThings, Home Assistant, or a native ecosystem like Alexa Routines) but need no custom code, most apps offer visual rule builders.