Table of Contents
ToggleAn outdoor kitchen transforms a basic backyard into a fully functional cooking and entertaining hub. But unlike assembling a grill, building one requires gas line hookups, electrical work, masonry, and weatherproofing, none of which you want to get wrong. That’s where a professional outdoor kitchen installer comes in. These specialists handle everything from permitting to plumbing, ensuring your setup is safe, code-compliant, and built to last. Whether you’re planning a simple grill island or a full outdoor culinary suite, hiring the right installer saves time, money, and headaches down the road.
Key Takeaways
- An outdoor kitchen installer handles complex tasks like gas lines, electrical work, masonry, and permitting that go far beyond typical DIY scope, ensuring your setup is safe and code-compliant.
- Verify that any outdoor kitchen installer has valid general contractor, electrical, plumbing, and gas fitting licenses—plus liability insurance of at least $1 million—before signing a contract.
- Outdoor kitchen costs range from $5,000 for a basic grill island to $100,000+ for high-end setups, with labor typically accounting for 30–50% of the total project cost.
- A professional outdoor kitchen installer should handle permits and inspections, coordinate multiple trades seamlessly, and provide at least one year of workmanship warranty on their installation.
- The complete installation process takes 2–6 weeks from design through final inspection, with proper site prep and concrete curing being critical to prevent water damage and structural issues.
Why Hire a Professional Outdoor Kitchen Installer?
Most outdoor kitchens involve work that goes beyond DIY territory. Here’s why bringing in a pro makes sense.
Code Compliance and Permits
Outdoor kitchens often require building permits, especially when you’re adding gas lines, electrical circuits, or permanent structures like pergolas. A licensed installer knows local codes (IRC for structures, NEC for electrical, International Fuel Gas Code for propane and natural gas) and handles the permit process. Skipping this step can result in fines, insurance issues, or the need to tear out non-compliant work.
Multi-Trade Expertise
A complete outdoor kitchen isn’t just carpentry. It involves:
- Gas fitting for natural gas or propane lines
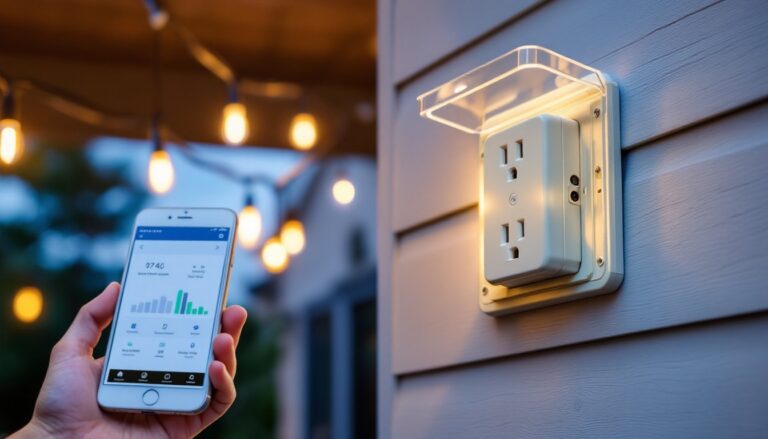
- Electrical work for outlets, lighting, and appliances (typically 20-amp circuits)
- Masonry or stonework for countertops, islands, and pizza ovens
- Plumbing if you’re adding a sink or ice maker
- Weatherproofing and drainage to prevent water damage
Professional installers coordinate these trades, or hold the certifications themselves, so everything ties together seamlessly.
Safety and Liability
Improper gas line installation or electrical wiring isn’t just a code violation: it’s a fire hazard. Licensed installers carry liability insurance and workers’ comp, protecting homeowners if something goes wrong during or after the build. They also size components correctly, ensuring your gas line can handle BTU demand, for example, or that your concrete pad can support a heavy stone countertop.
What to Look for in an Outdoor Kitchen Installer
Not all contractors specialize in outdoor kitchens. Here’s how to vet candidates.
Experience with Outdoor Builds
Ask how many outdoor kitchens they’ve completed in the past two years. Request photos of finished projects, not just renders or stock images. Look for variety: basic grill islands, full kitchens with sinks and refrigerators, custom pizza oven installs. Experience with your specific features (like a built-in smoker or kegerator) is a plus.
Trade Licenses and Specializations
Depending on your project scope, your installer may need licenses for:
- General contracting (required in most states for jobs over a certain dollar threshold)
- Electrical work (for wiring outlets, GFCI circuits, and lighting)
- Plumbing (for sinks, ice makers, or outdoor faucets)
- Gas fitting (for natural gas or propane lines)
Some installers are licensed in multiple trades. Others subcontract specialists but oversee the project. Either works, just confirm all tradespeople are licensed.
References and Reviews
Check online reviews on platforms like Angi and ImproveNet, but also ask for direct references. Call past clients and ask:
- Was the project completed on time and on budget?
- Did the installer handle permits and inspections?
- How did they manage unexpected issues (weather delays, material shortages)?
- Would you hire them again?
Red flags include vague timelines, reluctance to provide references, or multiple complaints about unfinished work.
Licensing, Insurance, and Certifications
Before signing a contract, verify the following:
- General contractor’s license: Check your state’s licensing board website. Most states require a license for projects over $500–$1,000.
- Liability insurance: Request a certificate of insurance (COI) showing general liability coverage of at least $1 million. This protects you if the installer damages your property.
- Workers’ compensation insurance: Ensures you’re not liable if a worker is injured on your property. Some states waive this for sole proprietors, but it’s safer if they have it.
- Trade-specific licenses: Verify electrical, plumbing, and gas fitting licenses through your local building department.
- Manufacturer certifications: Some appliance makers (like Lynx, Fire Magic, or Blaze) offer installer certification programs. While not required, it shows the contractor has trained on those product lines.
Don’t skip this step. Unlicensed contractors can’t pull permits, and their work won’t pass inspection, leaving you holding the bag.
How Much Does an Outdoor Kitchen Installation Cost?
Outdoor kitchen costs vary widely based on size, materials, and features. Here’s a realistic breakdown for 2026.
Basic Grill Island: $5,000–$10,000
- Includes a built-in grill (mid-range stainless steel), small counter, and basic masonry or stucco finish.
- Electrical outlet and minimal site prep.
- DIY-friendly if you’re comfortable with masonry and have gas/electric handled by licensed pros.
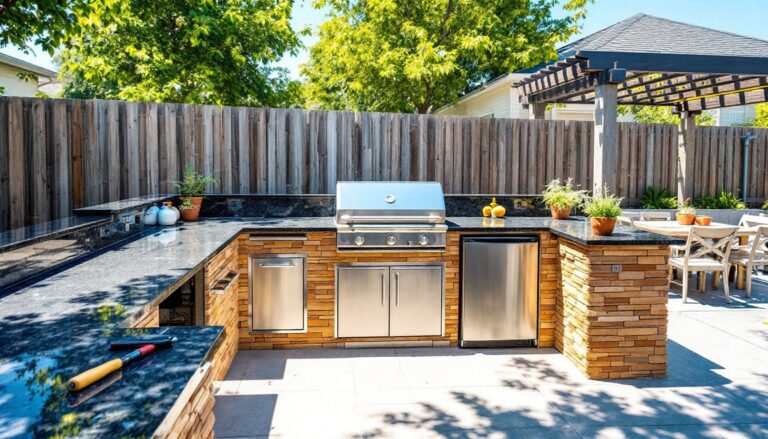
Mid-Range Outdoor Kitchen: $15,000–$35,000
- Built-in grill, side burner, sink with hot/cold water, refrigerator, and storage cabinets.
- Stone or tile countertops (granite, porcelain, or concrete).
- Gas line extension, dedicated electrical circuits, and basic lighting.
- Concrete pad or paver base.
- This is the sweet spot for most homeowners looking for a fun outdoor living upgrade.
High-End Outdoor Kitchen: $40,000–$100,000+
- Premium appliances (high-BTU grills, pizza ovens, smokers, kegerators).
- Custom stonework, outdoor-rated cabinetry, and high-end finishes.
- Full plumbing (including drainage and outdoor-rated fixtures), extensive electrical (including outlets, under-counter lighting, and ambient lighting), and natural gas hookup.
- Covered structures like pergolas or pavilions.
- Integrated features like outdoor TVs, fire pits, or outdoor party setup zones.
Cost Factors
- Appliances: A basic 3-burner grill runs $1,000–$3,000: high-end models hit $5,000–$10,000. Pizza ovens add $2,000–$8,000.
- Countertops: Granite or porcelain tile costs $50–$150 per square foot installed. Poured concrete or natural stone can run higher.
- Utilities: Running a new gas line costs $500–$2,000 depending on distance. Electrical work (new circuits, outlets, lighting) runs $1,000–$3,000.
- Site prep: Leveling, excavation, and pouring a concrete pad add $500–$3,000.
- Labor: Expect 30–50% of total project cost to go toward labor in most markets.
Get at least three detailed quotes. Avoid contractors who give rough estimates without seeing the site or understanding your scope.
Questions to Ask Before Hiring an Installer
Use these questions to separate serious pros from weekend warriors.
- Are you licensed, bonded, and insured?
- Ask for license numbers and proof of insurance. Verify them independently.
- Will you pull the necessary permits?
- The installer should handle permits and schedule inspections. If they say permits aren’t needed, double-check with your local building department.
- Who will be doing the work?
- Find out if the installer does all trades in-house or subcontracts. Either is fine, but you want to know who’s responsible.
- What’s the project timeline?
- Most outdoor kitchens take 2–6 weeks depending on complexity, weather, and inspection schedules. Be wary of installers promising a full build in a few days.
- What’s included in the quote?
- Clarify what’s covered: site prep, demolition, hauling, appliances, fixtures, electrical, plumbing, gas, countertops, finishing. Hidden costs kill budgets.
- Do you offer a warranty?
- Reputable installers warranty their workmanship for at least one year. Appliances come with manufacturer warranties, but installation issues (like leaky plumbing or faulty wiring) should be covered by the contractor.
- How do you handle change orders?
- Scope changes happen. Ask how the installer prices and documents modifications. Get any changes in writing before work proceeds.
- Can you provide references for similar projects?
- Speak to past clients whose projects match your scope. If you’re installing a pizza oven, talk to someone who had one installed.
Many homeowners research options through directories like HomeAdvisor’s outdoor kitchen builders to compare local installers and read verified reviews.
The Outdoor Kitchen Installation Process: What to Expect
Understanding the workflow helps you plan and communicate with your installer.
1. Design and Planning (1–2 weeks)
You’ll work with the installer to finalize layout, appliance selection, materials, and utilities. They’ll measure your space, assess existing gas/electrical access, and draft a plan. Some installers offer 3D renderings: others use sketches. Either way, get everything in writing before moving forward. Homeowners expanding their at-home outdoor living spaces often start with a design consultation.
2. Permitting (1–3 weeks)
The installer submits plans to your local building department. Approval times vary by jurisdiction. Electrical, plumbing, and gas work almost always require permits. Structural work (like a pergola or pavilion) may also need approval.
3. Site Prep and Foundation (1–3 days)
The crew clears the area, levels the ground, and pours a concrete pad or installs a paver base. The pad needs time to cure (typically 3–7 days for concrete) before framing begins. Proper drainage is critical, water pooling under your kitchen leads to settling and cracking.
4. Framing and Utility Rough-In (2–5 days)
If you’re building a structure, framing goes up first. Then the installer runs gas lines, electrical conduit, and plumbing rough-in. This work gets inspected before being covered. Many setups include a dedicated 20-amp circuit for refrigerators and another for outlets and lighting.
5. Masonry and Countertops (3–7 days)
The base structure gets finished with brick, stone, stucco, or outdoor-rated siding. Countertops are templated, cut, and installed. Granite and porcelain are common choices: they handle weather and heat better than laminate or tile. Outdoor kitchens featured in Stoneridge outdoor living projects often showcase custom stonework.
6. Appliance Installation and Final Connections (1–2 days)
Appliances are set, gas lines connected, plumbing hooked up, and electrical terminated. The installer tests everything, burners, outlets, water flow, and makes adjustments.
7. Final Inspection and Walkthrough (1 day)
The building department inspects the completed work. Once you pass, the installer walks you through operation, maintenance, and warranty details. Keep all documentation, including permits, warranties, and manuals.
Total timeline: 2–6 weeks depending on project scope, weather, and permit turnaround. Experienced installers, like those highlighted in Pacific Outdoor Living reviews, often complete projects on tighter timelines due to streamlined permitting and trade coordination.
Conclusion
Hiring a qualified outdoor kitchen installer ensures your project is safe, code-compliant, and built to withstand years of use. Vet candidates carefully, verify licenses and insurance, and get everything in writing. A well-built outdoor kitchen adds serious value to your home, and even more value to your weekends.