Table of Contents
ToggleBuilding an outdoor kitchen under open sky sounds great, until the first rainstorm or blistering July afternoon sends everyone back inside. An outdoor kitchen gazebo solves this by creating a dedicated, sheltered cooking zone that extends the use of your backyard through all four seasons. It’s not just about shade: a properly chosen gazebo provides ventilation for grills and smokers, protection for countertops and equipment, and defined boundaries that turn a scattered collection of appliances into an actual outdoor room. Whether you’re grilling burgers on a Tuesday or hosting a full cookout, a gazebo makes your outdoor kitchen functional and comfortable year-round.
Key Takeaways
- An outdoor kitchen gazebo protects cooking equipment from weather year-round while extending your grilling season from spring through fall with proper ventilation and optional heating.
- Hardtop gazebos ($800–$3,000+) offer superior durability and long-term protection for built-in grills and countertops, while soft-top canopies ($300–$1,200) suit portable setups but require fabric replacement every 2–4 years.
- Proper ventilation on your outdoor kitchen gazebo is essential to safely exhaust smoke, heat, and carbon monoxide from grills and smokers, making open-sided designs or integrated vent panels non-negotiable.
- Plan your gazebo layout around a work triangle (grill, prep surface, and refrigerator/sink) with at least 36 inches of clearance on each side and maintain 10–12 inches between the grill and any combustible surfaces per IRC guidelines.
- Many jurisdictions require a building permit for gazebos over 120 square feet or permanently anchored structures; always check local codes before installation and hire licensed professionals for gas, water, and electrical work.
- Invest in a reinforced concrete pad foundation and annual maintenance (rust inspections, anchor bolt tightening) to maximize the lifespan and safety of your outdoor kitchen gazebo investment.
What Is an Outdoor Kitchen Gazebo and Why You Need One
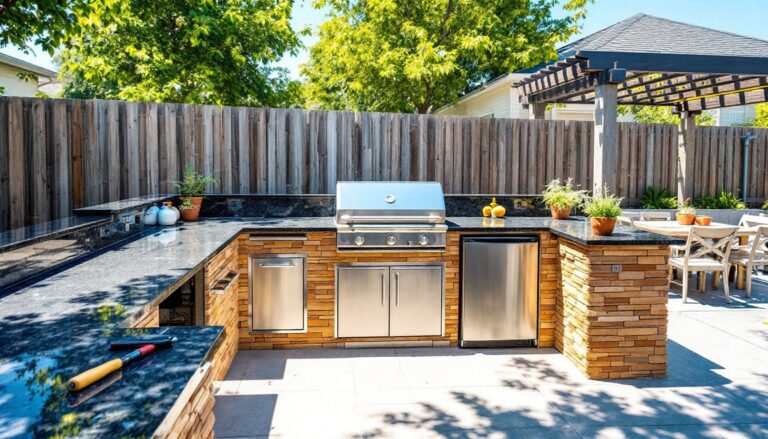
An outdoor kitchen gazebo is a freestanding or attached structure with a roof designed specifically to shelter cooking equipment, prep surfaces, and dining areas from weather. Unlike a standard patio cover or pergola, it’s engineered to handle the heat, smoke, and ventilation demands of grills, griddles, and other high-temperature appliances.
Most outdoor kitchen gazebos feature either a hardtop roof (metal, polycarbonate, or shingles) or a soft-top canopy (fabric), with open sides or partial walls for airflow. Dimensions typically range from 8×8 feet for a basic grill station up to 12×16 feet or larger for full prep-and-dining setups.
Why it matters: exposure to UV, rain, and temperature swings degrades countertops, rusts burners, and warps cabinetry. A gazebo extends the lifespan of your equipment and keeps your cooking space usable during light rain or midday sun. It also creates a visual anchor in your yard, defining the kitchen zone and making layout planning easier.
Key Benefits of Adding a Gazebo to Your Outdoor Kitchen
Weather protection is the most obvious advantage. A gazebo keeps rain off your grill grates and prevents your granite or concrete countertops from absorbing moisture that can lead to staining or freeze-thaw cracking in colder climates.
Extended cooking season is another major benefit. With a roof overhead and optional sidewalls, you can fire up the grill in October drizzle or March wind without huddling under an umbrella. Pairing a gazebo with outdoor heaters pushes that season even further.
Ventilation and safety matter more than most homeowners realize. Open-sided gazebos allow smoke and heat to escape naturally, which is critical when using charcoal, wood pellets, or propane. Some specialty outdoor kitchen features like pizza ovens or smokers generate significant BTUs and require proper airflow to prevent CO buildup.
Defined layout and aesthetics give your outdoor kitchen a finished look. Instead of equipment scattered across a patio, the gazebo frames the space and provides natural boundaries for lighting, electrical outlets, and even hanging pot racks or utensil hooks.
Choosing the Right Gazebo Style for Your Outdoor Kitchen
Gazebo style affects durability, maintenance, cost, and how well it integrates with your cooking equipment. The two primary categories are hardtop and soft-top, each with distinct trade-offs.
Hardtop vs. Soft-Top Gazebos
Hardtop gazebos use steel, aluminum, or galvanized metal roofs, sometimes with powder-coated finishes for corrosion resistance. These are the better choice for permanent outdoor kitchens with built-in grills, sinks, or countertops. They handle snow loads and high winds, and they won’t fade or tear. Expect to pay $800–$3,000+ depending on size and materials.
Installation typically requires anchoring to a concrete pad or deck with lag bolts. If you’re placing the gazebo over a new kitchen build, pour the pad first and plan post locations to avoid conflicts with plumbing or gas lines.
Soft-top gazebos use polyester or solution-dyed acrylic fabric stretched over a metal frame. They’re lighter, cheaper ($300–$1,200), and easier to move or store. But UV and moisture degrade fabric over time, plan on replacing the canopy every 2–4 years depending on sun exposure.
Soft-tops work for portable setups or seasonal use, but they’re not ideal if you’re housing a $2,000 built-in grill. For homeowners planning a covered outdoor living space that includes cooking, a hardtop is the more practical long-term investment.
Permanent vs. portable is another decision point. Permanent gazebos are anchored with concrete footings and may require a building permit depending on size and local codes. Portable models use weighted bases or ground stakes and can be repositioned, but they’re less stable in high wind.
Essential Features to Look for in an Outdoor Kitchen Gazebo
Ventilation is non-negotiable. Look for gazebos with open sides or integrated vents near the roofline. If you’re considering a model with sidewalls or mosquito netting, make sure at least two sides remain open or that vent panels are built in. Grills and smokers produce CO and grease-laden smoke: trapping it under a closed canopy is both a fire and health hazard.
Material and finish determine how the structure holds up. Powder-coated aluminum resists rust better than bare steel, and galvanized steel is a solid mid-range option. Avoid gazebos with thin, uncoated metal, they’ll corrode within a season in humid or coastal climates.
Roof design affects water drainage and snow load capacity. Sloped or gabled roofs shed water and snow better than flat designs. If you’re in an area with heavy snowfall, check the manufacturer’s load rating (measured in pounds per square foot). Most residential gazebos handle 20–30 PSF: anything less is a risk.
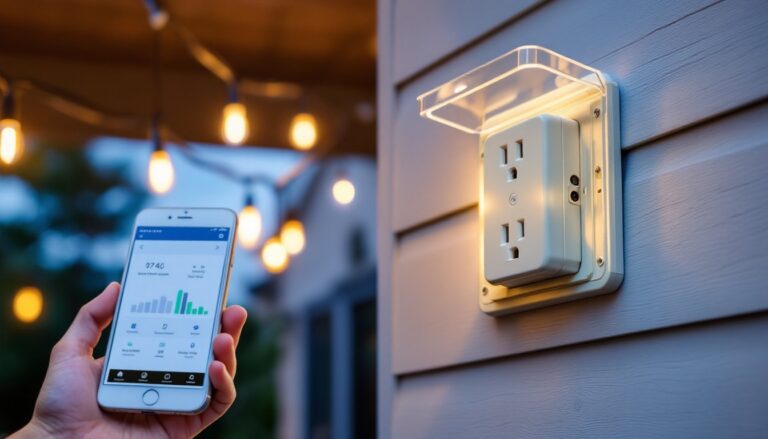
Integrated lighting and electrical access save headaches later. Some hardtop models include pre-wired LED strips or hooks for pendant lights. If yours doesn’t, plan for conduit runs or battery-powered LED strips. Cooking after dark without adequate task lighting is frustrating and unsafe.
Anchoring and stability are critical, especially for portable models. Weighted bases (sandbags or water-filled) work for calm conditions, but ground stakes or concrete anchors are necessary in wind-prone areas. If you’re in a region with frequent storms, budget for proper footings, don’t rely on stakes alone.
Planning Your Outdoor Kitchen Gazebo Layout
Start by mapping your cooking workflow. The classic work triangle, grill, prep surface, and refrigerator or sink, applies outdoors just like inside. Position your grill so prevailing winds carry smoke away from seating areas, and leave at least 36 inches of clearance on each side for safe access and ventilation.
Most gazebos for outdoor kitchens measure 10×12 feet or larger to accommodate a grill, side burner, countertop, and storage. If you’re adding a sink or refrigerator, you’ll need access to plumbing and electrical, which means planning trenches or conduit runs before pouring a concrete pad.
Clearances matter. The International Residential Code (IRC) and manufacturer guidelines typically require at least 10–12 inches between the grill and any combustible surface, including wood cabinetry or overhead structures. Even though your gazebo roof is non-combustible, double-check clearances for any built-in cabinetry or side panels.
Flooring under the gazebo should be non-slip and durable. Poured concrete (4-inch thickness with rebar or wire mesh) is standard. Pavers over compacted gravel work too, but they require edging to prevent shifting. Avoid wood decking directly under a grill unless you’re using a grill mat and maintaining strict clearances, grease drips and ember sparks are real fire risks.
Many homeowners integrate outdoor party setup considerations into their layout, adding bar seating along one side of the gazebo or positioning it adjacent to a patio dining area. Think about foot traffic: you don’t want guests cutting through your work zone to reach the cooler.
If your property has inspiration for outdoor entertaining like tiered patios or garden beds, position the gazebo to complement those sight lines rather than block them.
Installation Tips and Considerations
Permitting and codes: In many jurisdictions, a gazebo over 120 square feet or one that’s permanently anchored requires a building permit. Attached gazebos (connected to your house) almost always do. Check with your local building department before ordering materials. Setback requirements, the distance from property lines, also apply.
Site prep is where most DIYers cut corners and regret it later. Level the ground, excavate for footings if required, and pour a concrete pad (minimum 4 inches thick, reinforced with rebar or wire mesh) before assembly. If you’re anchoring to an existing patio, use masonry anchors rated for the gazebo’s wind load.
Assembly is usually a two-person job. Hardtop gazebos ship in multiple boxes with pre-drilled frames. Follow the instructions exactly, skip steps or reverse panels and you’ll be backtracking. A cordless drill, socket set, level, and rubber mallet are essential. Some models weigh 200+ pounds assembled, so plan for help during the roof installation.
Utilities: If you’re running gas, water, or electric to the gazebo, hire licensed pros for anything beyond basic 120V outlets. Gas line work requires a plumber and often an inspection. Electrical runs buried underground need conduit (PVC for 120V, metal for 240V in some areas) and GFCI protection. Don’t DIY this unless you’re comfortable with NEC requirements.
PPE and safety: Wear safety glasses during assembly (metal edges and drill bits), work gloves for handling sharp roof panels, and steel-toe boots if you’re moving heavy components. If you’re cutting metal trim, use ear protection and a face shield.
Maintenance: Hardtop roofs need an annual inspection for rust spots, loose fasteners, and clogged drainage. Soft-top canopies should be cleaned with mild soap and water, then air-dried to prevent mildew. Tighten anchor bolts every spring, especially after freeze-thaw cycles.
For homeowners building a more comprehensive at-home outdoor living setup, consider coordinating your gazebo install with other structures, pergolas, fire pits, or fun outdoor living zones, to create a cohesive design that doesn’t feel piecemeal.
Finally, if you’re pairing your gazebo with a portable BBQ rather than a built-in, make sure the gazebo dimensions allow you to wheel the unit in and out without disassembling sidewalls or netting. Flexibility matters if you’re still experimenting with layout or upgrading equipment over time.